ProNextJS
    lesson

    Create and Deploy a Next.js Application

    Jack HerringtonJack Herrington

    In this section, we'll begin developing our application by creating a Next.js app locally. This approach closely mirrors the development process you'd experience on the job.

    NOTE: The command to install shadcn/ui is pnpm dlx shadcn@latest init when using pnpm

    To get started, create a new Next.js application locally using your preferred package manager. In this walkthrough, we use pnpm to create the app:

    pnpm dlx create-next-app@latest chat-gpt-app --use pnpm
    

    The command above uses pnpm and dlx to create a new next.js application. The @latest flag ensures the most recent version of next.js is installed. The chat-gpt-app argument names the app, and the --use pnpm flag ensures pnpm is used throughout.

    After running the command, you'll move through a series of prompts.

    Choose TypeScript and ESLint according to your preference. Considering the UI components will be styled with the shadcn toolkit, which builds on top of Tailwind CSS, select Tailwind CSS when asked about styling. To keep your main directory tidy, select 'yes' when asked if everything should be in a source directory.

    Make sure to choose App Router. It's now the recommended router application, replacing the older Pages Router. Don't customize the import alias, so it stays relative to the source directory.
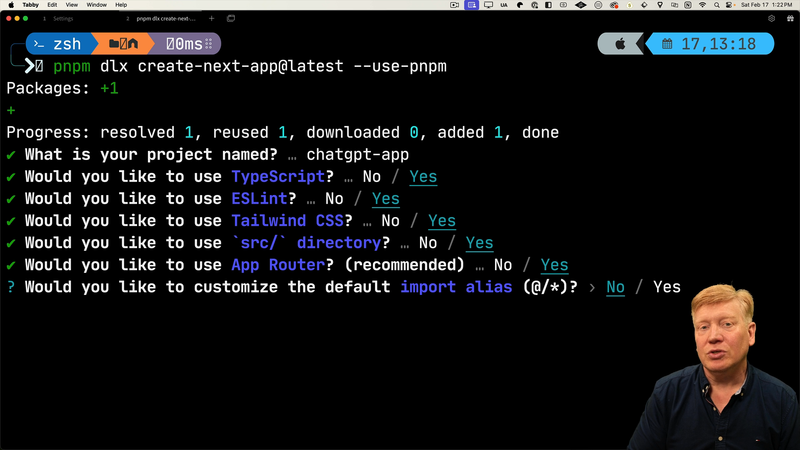
    new app settings

    With the setup complete, open your app in your preferred code editor.

    Now, let's start the development server. Using the terminal, navigate to the newly created directory and start the server with the 'dev' script:

    cd chat-gpt-app
    pnpm run dev
    

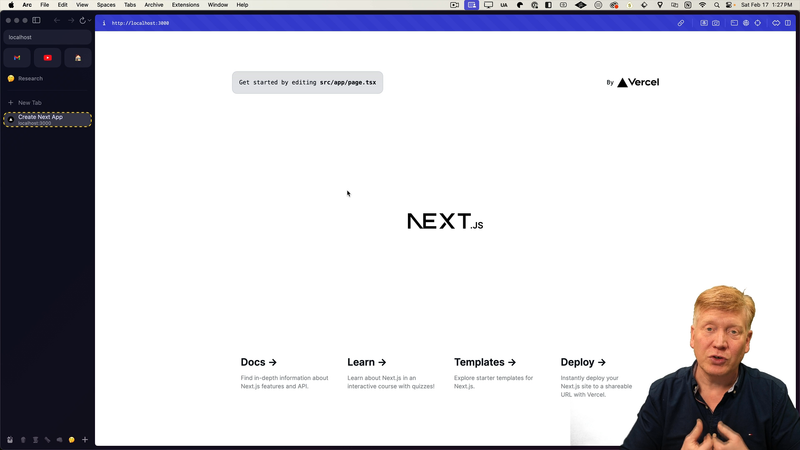
    Navigate to localhost:3000 in your browser, and you should see the Next.js starter page.

    In your app's package.json file, you'll find other scripts, such as 'build', which processes your code for production and saves it in the .next directory. To start the production build server, use the 'start' script. There's also a lint script available that runs ESLint.

    Adding shadcn

    Next, you'll want to setup shadcn, the toolkit you'll use to create UI components.

    To do so, switch back to your terminal and stop the dev server, then run the following command:

    pnpm dlx shadcn@latest init
    

    You'll be prompted to input your style preferences.
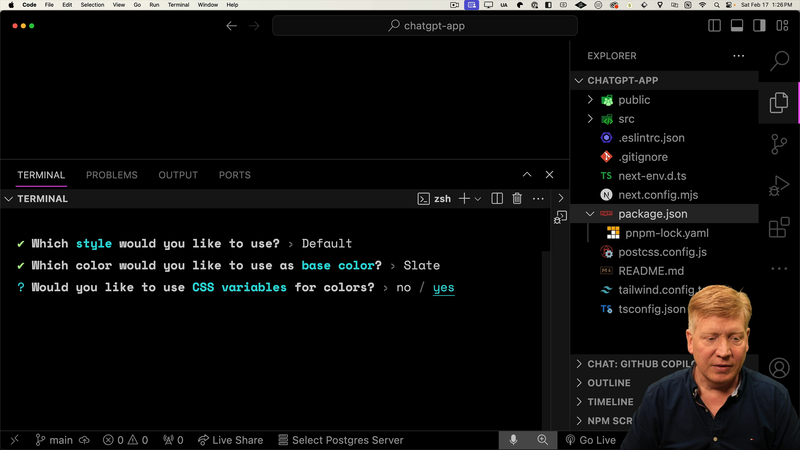
    shadcn style preferences

    After initializing shadcn, a new file named components.json will be created.

    This file tells us that shadcn will store the code inside of the@components directory.

    A @lib directory is also created, which includes a utility for concatenating class names. shadcn also updates your Tailwind configuration to include the CSS variables you set up.

    You can verify the shadcn setup by restarting your dev server and refreshing the page. A stark white page should greet you.
    the homepage is now white

    If you prefer working in dark mode, you can enforce this by applying the Tailwind dark class to the body.

    Inside of globals.css, add the following CSS:

    body {
      @apply dark;
    }
    

    Updating the Home Page and App Title

    Inside of src/app/page.tsx we can remove the default starter markup and replace it with a "Welcome to GPT Chat" message:

    export default function Home() {
      return (
        <main className="p-5">
          <h1 className="text-4xl font-bold">Welcome To GPT Chat</h1>
        </main>
      );
    }
    

    Next, update the title to display "Welcome to GPT Chat". This can be done in src/app/layout.tsx inside of the metadata object:

    export const metadata: Metadata = {
      title: "Create Next App",
      description: "Generated by create next app",
    }
    

    Refreshing the browser, we can see the changes took place.

    Note that any metadata changes needed later can be done on a per-route basis!

    Deploying the Application to Production

    Next.js applications are easily deployed on Vercel, which offers a free plan.

    To start the process, you'll need to push your code to GitHub.

    After creating a new repository (for example, 'chat-gpt-app'), add your existing Next.js files to it from the terminal:

    git add .
    git commit -m "First commit"
    git remote add origin https://github.com/username/chat-gpt-app.git
    git push -u origin master
    

    Once you've pushed the changes, log in to Vercel using your GitHub account.

    On the Vercel dashboard, you'll see all of your GitHub repos. Select the one you've just created and hit 'Deploy'. Don't worry about changing any of the default settings at this point.

    And that's it! Your application is now live and accessible using the generated Vercel URL.

    Moving forward, each step of our app development will be deployed to production, replicating real-world development.

    In the next section, we'll work with layouts and create our first route.

    Transcript

    Let's start bailing out our application. First thing we're going to do is create a next app. Now I'm going to do this locally and I encourage you to do that too. That just keeps this course real. We want to keep it as close as possible to what you might be doing on the job. And on the job, you're going to be using a computer and doing it locally. So we're going to go and create our next app locally.

    I'm going to use PMPM for that because that's my favorite package manager. And then DLX create next app. And then I'm going to use at latest. So you get the latest and greatest version of Next.js. And I'm also going to put on the end, use PMPM. So to make sure that when it does its package install, it uses PMPM for that. So it's going to be PMPM across the board.

    All right, I'm going to hit return and let's see what we get next. So for my application name, I'm going to use chat-gbt-app. I'm definitely going to use TypeScript. I'm going to choose to use ESLint. You can decide whether or not you want to on your app. I'm definitely going to choose tailwind-css because shad-cn, which is the

    toolkit that we're going to use to create UI components to make our user interface look really nice, is built on top of tailwind-css. So we need to select that here. Now, should I put everything in a source directory? I'm going to choose yes for this because I like to have a nice, clean top level directory.

    And choosing source here means that everything to build the application, all the source code is going to go in the source directory. So I'll choose yes for that. I'm definitely going to choose app-router. It is now the recommended router. The alternative here is to use the older pages router. This whole course is about using the app-router, so I'm going to choose yes. And I'm not going to customize the import alias.

    That means that anytime I do @/, that's going to be relative to the source directory. Now let's bring that up in Visual Studio Code. To do that, I'm going to cd into my chat-gbt-app directory and then do code. That's going to launch VS Code in this directory. All right, looks like we're all set up. I'm going to bring up the console.

    And then in my console, I'm going to use the pmpm command and run the dev script. That's to launch the development server. Now let's take a look at what we have on localhost 3000. And we just got our Next.js starter page. So, so far, so good. Now let's go back and take a look at our package.json so you can see the other scripts that are available to us.

    So we've got dev, that's going to launch the development server. Then we have the build command that's going to build the production code for us. That's going to put all the code transpiled into the .next directory. After we have that, you can do the start command and that's going to start your production build server that you just built with the build command.

    And of course we've got the lint command that will run that ESLint linter. All right, now we are going to be using ShadCN, so let's get that set up. To do that, I'm going to go back into the terminal, stop the app, and then run mpx, which is a command line runner. You get the module, in this case, ShadCN UI at the latest version, and you give it a command you want. In this case, I'm going to say init.

    That's going to initialize our project to use ShadCN. It's going to give us a couple of questions. What style do we like? I'm just going to pick the default and pick the default color. In this case, slate, and I'm going to choose CSS variables for my colors. You can choose whichever you like. All right, we're set up. That's cool. So what actually happened?

    Well, if we take a look over here, we have a new file called components.json. That's from ShadCN. That tells us where it's actually going to put the code. So it's actually going to put the code in the @components directory. You can see that it's done that over here. It's created an @components directory. There's nothing in it so far. We haven't added any components.

    It's also created an @lib directory that has some utils in it. Really, it's just this nice little class name concatenator. That's really all that's in there. It also has the preferences that we set up, and it's also made some configuration changes to our tailwind to go and set up those CSS variable names.

    We can go over to our source again and see that it's also made some changes in our app, globals.css, so we originally were just bringing in tailwind, and now we are actually adding on some of those colors that I guess this is the slate color set that we've defined, and it's using CSS variables for that.

    Now let's go take a look. Run pmpm dev again, and I'll hit refresh, and now we have a stark white version. Now, I personally prefer to work in dark mode, so I'm just going to unconditionally set this to dark mode by saying that we want to apply the

    tailwind dark class to the body. Let's hit save, and now we've got dark theme. Nice. So our application is obviously not this Next.js starter page, so let's go over into our page file. This has the code for the homepage, and in there, we're just going to trim this

    home down to a simple component that just says, "Welcome to GPT chat." Let's save, and there you go. Right at the top, "Welcome to GPT chat." Now, if you notice here, the title is "Create Next app." Let's go into the layout and change the title of the application. So over here in layout, you'll find the metadata section.

    You can change this to whatever you want. I'm going to have it read, "Next.js chat GPT app," and I'm going to put a description in there. This is going to be the default title for our application. You can actually change metadata on a per route basis, and we'll get to that later on in the course.

    Let's save, and now we can see that our app name is "Next.js chat GPT app." Now, to keep this realistic, we are going to deploy this every step along the way to production. And the easiest way to deploy a Next.js application is to deploy it on

    Versal, and it's free for single users like us, so the first step in getting there is to go and put our code into GitHub. So let's go and create a GitHub repo where we can put our code. So I'm going to create a new repo. I'm going to give it the name "chat GPT app."

    I'm going to choose to make it a private repo, and other than that, I'm going to create the repository. All right, so we're good to go. I'm going to actually copy this line out, because the next lines are pretty easy. Let's go over to our terminal. I'm going to add all the files to our local repo.

    The Create Next App application has actually generated a Git repo for us. So all we need to do now is just add the files we've changed, and then I'll commit that with my first commit. Now, the next thing I need to do is connect it to our repo. So I'm going to paste that line that we were given by GitHub.

    That's going to connect our local Git repo with our GitHub repo. And then finally, I'm going to use git push to push the current code to our repo. Now, let's go take a look. I'll refresh in GitHub, and there you go. Cool.

    Let's make sure that we got all the changes we made. So we'll go to Source, App, Page, and we can see that we've got our Welcome to Chat GPT app. Looks like we're good to go. Let's get this into production. So we'll go over to Versal. Now, over on Versal, I'm going to log in using GitHub so that it's connected to my GitHub account.

    Now, from this dashboard, I can import a project, and it'll show me all of my GitHub repos, including the one that I've done most recently, which is the Chat GPT app, so I'll import that. And I'm not going to change any of these variables. It is all set up and good to go.

    So I'm going to hit Deploy, and we've done it. We have deployed our application to production. Let's go back to our GitHub repo and see what we've done. So we've deployed our application to production. Let's go over to the dashboard. That's going to give us our links. So we're going to go and click on our domain.

    And there we go. Our application is in production, and anyone can go in now and take a look at our app, hand it off to anybody and say, "Hey, this is the Next.js application I just built." In the next session, we're going to take a deeper look at layouts