ProNextJS
    Loading
    lesson

    File-Based Routing with App Router

    Jack HerringtonJack Herrington

    Next.js has always been a file-based routing system, though the syntax has changed over time. With the introduction of the App Router, file-based routing continues to be an intuitive way to define routes in your application.

    File-Based Routing

    File-based routing in Next.js means that the location of the page.tsx or route.ts file inside the app directory defines how it maps to a given URL. By organizing your files and directories in a specific way, you can create routes that correspond to the desired URLs.

    Let's build a quick demo app to experiment with the different types of routes you can define in a Next.js application using the App Router.

    Creating the Demo App

    To create a new demo app, run the following command:

    pnpm dlx create-next-app@latest --use-pnpm route-test
    

    Like before, say "yes" to all of the options you are presented, then navigate into the route-test directory and open it in your code editor.

    Basic Routes

    The most basic route in a Next.js application is the homepage, which is defined by the src/app/page.tsx file. This file maps directly to the root URL (/).

    When we trim down the page.tsx file to just say "Home page", we'll see it displayed when we visit the root URL.

    // inside page.tsx
    
    export default function Home() {
      return (
        <main className="...">
          <h1 className="...">Home page</h1>
        </main>
      );
    }
    

    Special Properties

    Every page.tsx route receives two special properties: params and searchParams. For the homepage, we don't have any parameterized routes, so we'll focus on searchParams.

    Here's how we would add the searchParams property to the Home component:

    export default function Home({ searchParams }: { searchParams: Record<string, string | string[]> }) {
      return (
        <main>
          <h1>Homepage</h1>
          <h2>Search Params:</h2>
          <pre>{JSON.stringify(searchParams, null, 2)}</pre>
        </main>
      );
    }
    

    If we add search parameters to the URL, such as ?q=5&a=10, the searchParams object will contain the corresponding key-value pairs. If a parameter appears multiple times in the URL, its value will be an array of strings.

    params displayed on the home page

    Nested Routes

    To create a specific route within the application, we can nest directories inside the app directory. For example, to create an /about route for the application, we would create a src/app/about/page.tsx file.

    This can be further nested to create more complex routes. For instance, an /about/you route would be defined by the src/app/about/you/page.tsx file.

    Copying and pasting the page.tsx contents into these files would display the corresponding content when visiting the respective URLs:

    the nested route

    Parameterized Routes

    Parameterized routes allow you to handle dynamic segments in the URL. To create a parameterized route, you can use brackets ([]) in the directory name to specify a dynamic segment. For example, to create a /product/:productId route, you would create a file at app/product/[productId]/page.tsx.

    The page.tsx file for a parameterized route receives a params prop, which is an object containing the dynamic segments as keys:

    export default function ProductDetail({
      params,
      searchParams,
    }: {
      params: { productId: string };
      searchParams: Record<string, string | string[]>;
    }) {
      return (
        <main>
          <h1>Product Detail Page</h1>
          <p>Params</p>
          <pre>{JSON.stringify(params, null, 2)}</pre>
          <h2>Search Params</h2>
          <pre>{JSON.stringify(searchParams, null, 2)}</pre>
        </main>
      );
    }
    

    Now if we visit /product/foo, the params object will have a productId property with the value "foo":
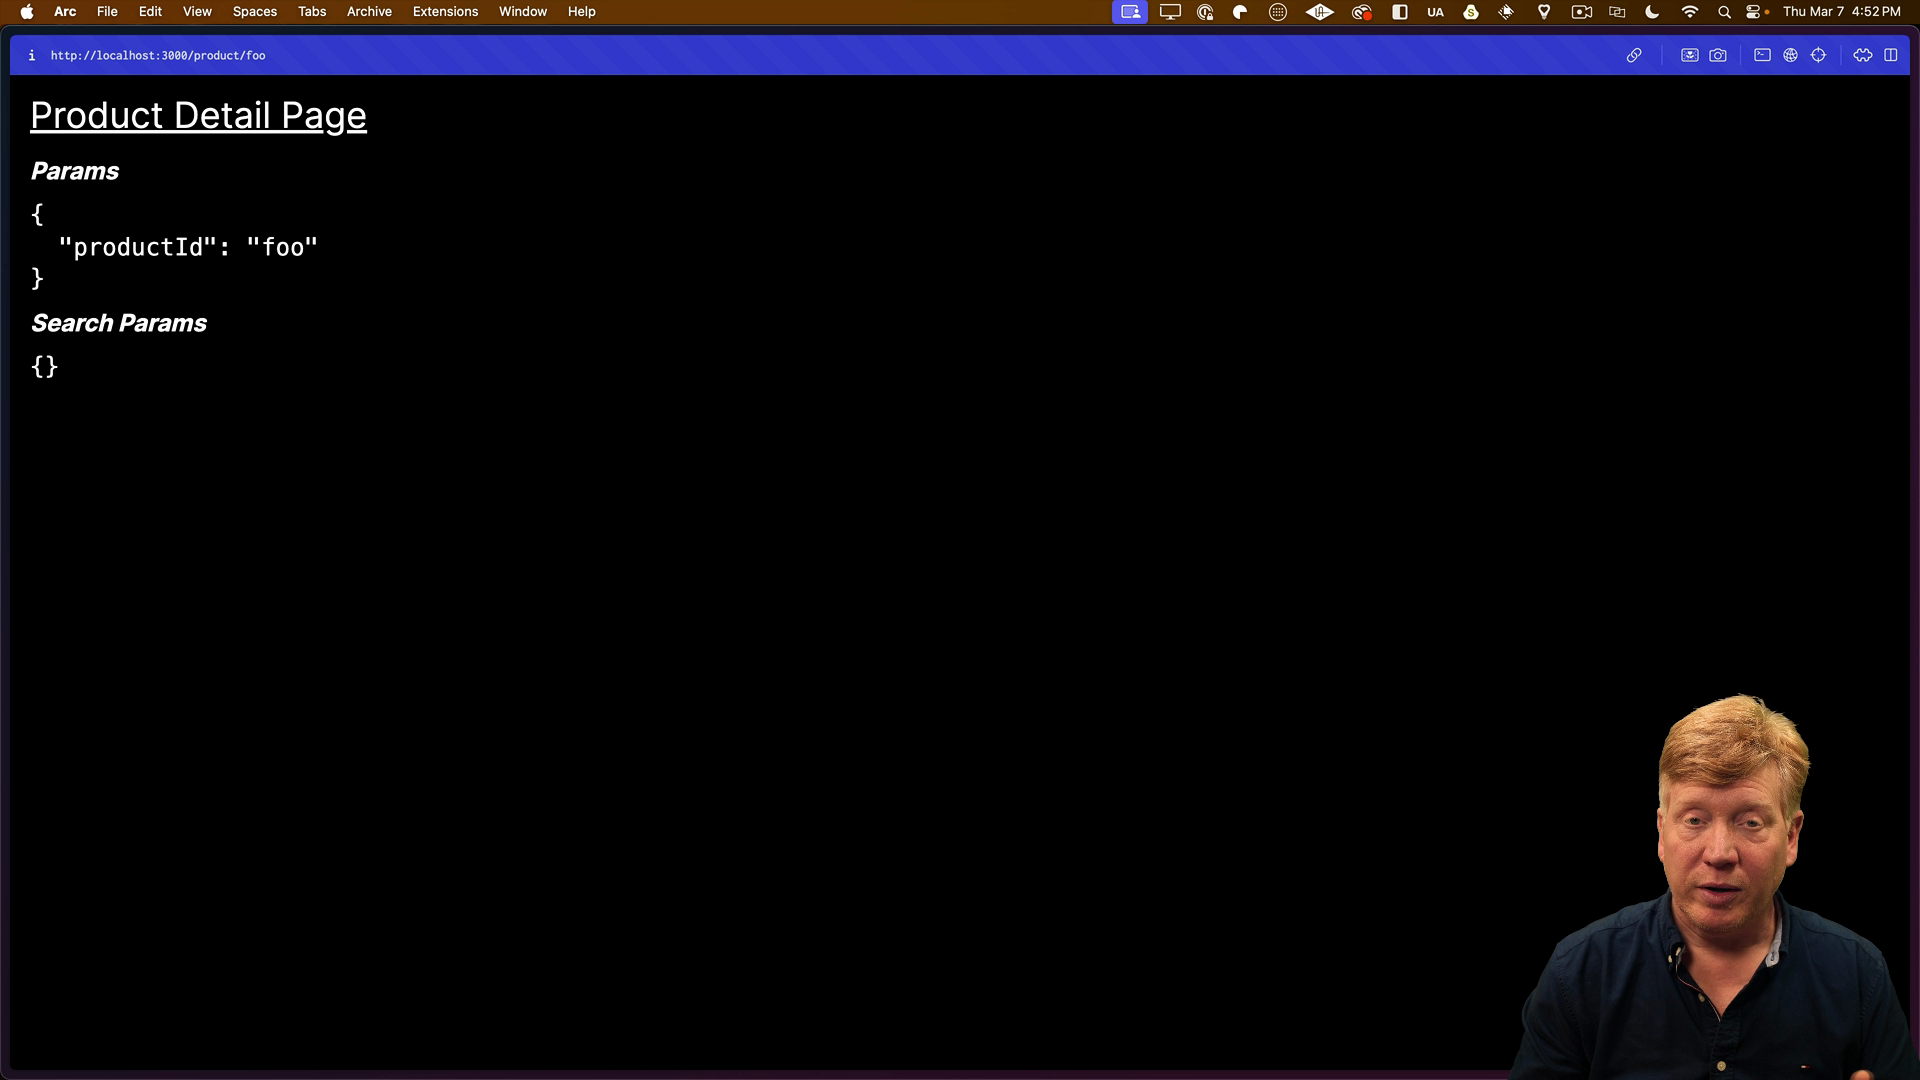
    the product detail page

    However, navigating to /product will give us a 404 erros since no page is defined for that route. In order to fix this, we'll have to create a /product/page.tsx file for the Product Home Page.

    Catch-All Routes

    Catch-all routes allow you to match any number of URL segments after a certain point. To create a catch-all route, you can use the ... syntax in the directory name, followed by a parameter name.

    For example, say we wanted to create a setup that would allow for routes for /setting/a, /setting/a/b, /setting/a/b/c, and so on. We would create a src/app/setting/[...setting]/page.tsx file.

    The page.tsx file for a catch-all route receives a params prop with an array of the matched segments:

    export default function SettingPage({
      params,
      searchParams,
    }: {
      params: { setting: string[] };
      searchParams: Record<string, string | string[]>; 
    }) {
      return (
        <main>
          <h1>Setting Page</h1>
          <p>Setting: {JSON.stringify(params.setting)}</p>
        </main>
      );
    }
    

    If we visit /setting/a/b/c, the params prop will be { setting: ["a", "b", "c"] }.

    setting catch-all route

    Like before, a page.tsx file will have to be created in order to have a Setting Home Page.

    Optional Catch-All Routes

    Optional catch-all routes allow you to match any number of URL segments after a certain point, including the case where no additional segments are provided. To create an optional catch-all route, you can use double brackets ([[...slug]]) in the directory name.

    For example, for an Info page we could create a src/app/info/[[...item]]/page.tsx file.

    If we visit /info, the params prop will be undefined. If we visit /info/a/b/c, the params prop will be { item: ["a", "b", "c"] }.

    Route Groups

    Route groups allow you to create a maintainable structure inside the app directory by grouping related routes together. To create a route group, you can wrap the folder name in parentheses like app/(teamA)/editor/page.tsx

    The teamA directory is not included in the final URL, so (teamA)/editor corresponds to /editor.

    the editor page

    Routing Cheatsheet

    Through these examples, we've created a useful routing cheatsheet:

    Here's the fixed table with proper markdown formatting:

    PathURL Examples
    /page.tsx/
    /about/page.tsx/about
    /about/you/page.tsx/about/you
    /product/[productId]/page.tsx/product/foo, /product/bar
    /product/page.tsx/product
    /setting/[...setting]/page.tsx/setting/a, /setting/b/c
    /setting/page.tsx/setting
    /info/[[...item]]/page.tsx/info, /info/23, /info/23/detail
    /(teamA)/editor/page.tsx/editor

    In addition to page.tsx files, you can also use route.ts files to create route handlers at specific URLs. However, you can only have either a page.tsx file or a route.ts file for a given route, not both.

    Transcript

    So I think it's time that we took a deeper look at how the App Router does its file-based routing. So the App Router is a file-based router, just like the Pages Router was before it. So Next.js is and always has been a file-based routing system, though the syntax for that has changed.

    There are other routers out there, notably React Router, which is a SPA-based router that can be used in a file-based routing system like Remix. So it actually does both. Next.js' App Router actually only does file-based routing. So what is file-based routing?

    Well file-based routing is when the location of the page.tsx or route.tsx file inside of the App Router directory or the app directory defines how that's going to map to the given URL.

    So I think it's actually easier to try than to explain because there's a lot of different options and you'll want to know them really well as you're going and doing your App Router development. So to learn it in more detail, I think we should go and build ourselves an example application that will allow

    us to experiment with these routes and see what actually happens. Now I know that when we focus on a particular feature of Next.js and build these experimental applications, it's often tempting to just watch me do it, but I think you really should do it yourself this time for sure. The reason is that you really want to know how these routes work and it's an

    invaluable resource later on when you're building out your own application. You can just simply see how you did it before, copy and paste it from before and you'll have your routes set up the way that you want them to be. So let's go and build out our routing application. All right, to create my route test application,

    I'm going to use the PMPM-DLX to run create-next-app at the latest. And I would like to use TypeScript and ESLint and Tailwind and I'll put it in the source directory. And of course I'm going to use the app router.

    I'm not going to change the import alias. And now I've got that all set up. Let me go into VS Code. All right, I'm going to trim the homepage down to just something that says homepage on it. All right, that looks pretty clean. Let's bring it up in developer mode.

    So this is our homepage route. It's on slash. And how did we get here? Well, to talk more about that, we will be building a table of paths to URLs as we go. So this is our source app page.tsx file and it maps to slash. So going on from here and to save a little space,

    I'm just going to remove that source/app directory and I'll just make in this case/page.tsx. So that gives you a little bit smaller of a path to look at. So page.tsx just maps to slash. Now there's two special properties that go to any route. The first is params. We don't have a parameterized route with the homepage,

    so we're not going to use that, but we are going to look at search params. For any page.tsx file, you're going to get these two properties and one of them is search params. And for the moment, let's just call that type of any. And then I'm going to drop down here an H2 that says search params, and I'm going to stringify the search params to see what we get. All right,

    currently we're getting nothing. Let's go and add some search params. So Q equals five. How about that? All right. So it's an object and that object has a keys and values. So the true TypeScript might be something like this.

    We are a record that goes from string to string, maybe, or let's test that. Let's add another value. All right, there you go. So yeah, Q is five, A is 10, but what if we had another Q?

    Aha. So if you've got multiple of the same value, then those come in as an array. So the actual typing is more like this is either a string or an array of strings. And this is going to be true for every single route that we look at. Any route can take search parameters.

    So the next type of route we're going to take a look at is a specific route within the application. For example, slash about slash page.tsx, which is going to map to slash about. So to create that, we'll go into the app directory, create a directory called about, and then within that page.tsx,

    then we create exactly the same thing, but now we're in the about directory. And if I go back here and add about to the URL, there's our about page. I can even nest more deeply, like say, slash about,

    slash you slash page.tsx, which would go to about you. And so within that about directory, we create another nested directory you with page.tsx inside that. And there is our about you page. And again, we can test that in our browser. All right, there we go.

    Search params and all, we got our about you page. All right, now that's the easy stuff. And you probably knew that already, but let's go with something more complex. So take for example, a slash product routes. We're going to want to have a slash product slash foo, but we're also going to want to be able to have slash product slash bar or really slash product slash anything for a product ID.

    So what would we do for that? Well, we'd have a new directory called slash product. And then within that a directory, the name brackets product ID. And then within that page.tsx, this is called a parameterized route. Let's try it out. So we're in the app directory. We're going to create a new file called product.

    And then within that product ID in brackets and then page.tsx. Now this is going to bring in the second prop called params. Params is going to be an object. That object is going to have any of the parameters. That'd be the bracketed sections as keys in this object.

    So in this case, we're going to get params. It's going to have the key of product ID and everything's gonna be a string. All right, let's hit save and give this a try. So we'll go to the product foo page. All right. So we got no search parameters. We have no question mark with those values, but we do have the params,

    which has the product ID of foo. Do the same thing with bar. And there you go. So now we've got that working, but what happens if I go to, for example, just slash product, where will I go? Well, let's try it out and over the browser and see what happens. So I get rid of slash bar there and go to product. I get a 404.

    There's no route that matches that. So why is that? Well, at this point, there's no page.tsx file in the slash product directory. There's one inside of the parameterized directory, but there's nothing at the top level. So let's go create a page.tsx file within product. So inside the product directory, we'll create a new page.tsx file.

    And we'll put our product homepage in there. And now back in our browser, we've got the product homepage. Now it's not going to take any parameters because there's no parameterized segments in the URL, but it is going to take search params if those are available. So the right path there is slash product slash page.tsx. But let's go a little bit deeper.

    Let's say that we wanted to have slash product slash foo slash details. So again, 404, because there's nothing that matches that route. So how do we make that route? Well, then that bracketed product ID directory, we can create a new directory called details and

    within that page.tsx. Now if I go back to the browser, you can see that this product detail page still gets the parameter from the slash product route. So it still gets the product ID parameter of foo in this case, but it gets no search parameters because I haven't put any on there. I can change that for example, to bar. And now I get the product ID of bar.

    You can have as many of these parameterized segments within the URL as you want. Well, let's say you have something like a setting page. You've got setting slash a, but you've also got setting slash BC. So you've got multiple pieces after slash setting. So how would we handle that? So in this case, the path would be slash setting.

    And then within that, another directory brackets and then dot, dot, dot setting. And then within that page.tsx. Now you can use any name you want. You don't have to choose, for example, in this case, setting as the param. I just chose that as that value, but that's going to be a catch all route. It's going to catch all of the stuff after a slash setting.

    Let's give it a try. All right. So inside of our app directory, I'm going to create a new folder called setting. And then inside that the brackets with dot, dot, dot, and whatever name I want for that parameter. So I'm going to use setting. And then page.tsx.

    I'll bring in my component in this case, setting catch all, because they're going to be catch all component that goes and catches all the parameters after slash setting. And I'll hit save. And I'll go to slash setting slash a. And there we go.

    We got our catch all route that gets an array for the strings. So it's going to be a string array with all of the segments of the URL. So for example, ABC will give us a, B and C in an array. That's actually kind of nice that they unconditionally give us an array there. I think I've seen other frameworks where you'll get just a single value.

    If there is only a single segment after the route, and then you'll get the array. Otherwise you kind of have to do a type check to see if it's an array or not. This one is just an array in all cases, if you have a catch all route. It was really nice. All right. But what happens if I go to slash setting? Well, in that case, this is not covered and you'd have to create a setting.page.tsx file. Let's give that a go.

    So let's go create a setting home by creating a page.tsx file inside of that setting directory. And then we just create our setting home. All right, let's hit save. Try it. All right, there you go. You got our setting home page because we now have a slash setting slash page.tsx

    file. All right, let's talk about optional catch all routes. Those are catch all routes. So they use a dot, dot, dot, but they don't actually have to have any segments after that URL. So for example, you've got the slash info directory and then inside that double brackets, which is how you say that this is an optional catch all route,

    then dot, dot, dot, and whatever name you want. So in this case, item, and then within that page.tsx. So that would match slash info slash 23, as an example, or slash info slash 23 slash detail, or just slash info. Let's give it a try. All right, again, in the app directory, I'm going to create a new directory info. And then within that,

    the double brackets item and then page.tsx. So here's our component for the optional catch all page. It's version of parameters is going to have an object where item, which is the parameter is going to be an optional parameter. And then if it's there, it's going to be an array of strings.

    So let's give it a try. So I go to info, then I don't get anything for my parameters, but if I add on ABC, I get an item as an array of strings with A, B, and C. Now one last convenience thing that the app writer supports are route groups.

    So we have a folder name with parentheses around it. Like for example, in this case, team A that creates a route group team A, and then under there, you actually get your own set of routes. The team A effectively disappears from the URL. So in this case,

    team A editor page.tsx just becomes slash editor. And this is really just about creating a maintainable structure inside of that folder so that not everything is at the top level. Let's give it a try. So again, at the app level, I'm going to create a new file with team A

    and then inside of that editor, and then inside of that page.tsx. And here is team A's editor component. It doesn't take any parameters because there's no parameters in the route, but it could of course take parameters, but it does take search parameters because all of the routes take search

    parameters. Let's give it a try. So I go over here to editor. Nice. Now I've got team A's editor page, but you can see that that parenthesized team A directory just goes away from the URL. All right, there you go.

    A nice Next.js AppRouter cheat sheet that shows you all the ways that you can define routes inside of your AppRouter application. Now with any of these routes, you can use a route.ts file instead of a page.tsx file. If you want to create a route handler at that URL, it's an either or proposition though.

    You either have to have a page.tsx file or a route.ts file.