Parameterized routes allow the user to load data based on a specific parameter in the URL. For example, /chats/id would point to a chat with the given id, and load its data.
Let's implement this feature, starting with updating the Chat component.
Preparing the Chat Component
To get started, we'll need to expand our chat component's capabilities since we're planning to use it on both the homepage to initiate chats and on the route to the chat specified by the chatId.
The default id will be null, and the messages will be initialized with the initialMessages from the current chat or an empty array:
export default function Chat({
  id = null,
  messages: initialMessages = [],
}: {
  id?: number | null;
  messages?: Message[];
}) {
  const [messages, setMessages] = useState<Message[]>(initialMessages);
  ...
Now we'll move on to creating the route.
Creating a Parameterized Route and Component
Navigate back to the app directory and create a new file chats/[chatId]/page.tsx. The chatId will be the parameter we're interested in. We're going to use the page.tsx extension because we plan to include a React component here.
chats/[chatId]/page.tsx
In order to get the chatId from the URL, we need to have the ChatDetail component use the params property. This special property contains a list of params, which in this case is the chatId as a string. If you had multiple parameters, they would each be additional keys on the params object.
Here's the start of the ChatDetail component:
// inside chats/[chatId]/page.tsx

export default async function ChatDetail({
  params: { chatId },
}: {
  params: { chatId: string };
}) {
  // component code will go here

}
Displaying the Chat
Now, we have to import our Chat component because we're planning to display it, and we'll wrap it in a main tag.
We will have the chatId, so we will need to use getChat from the database to retrieve the chat:
// inside chats/[chatId]/page.tsx
import Chat from "@/app/components/Chat";
import { getChat } from "@/db";
Inside the ChatDetail component, we can use getChat to retrieve the chat details. Since we're in a React server component, we can use await to get the chat details directly. Note the use of the + operator to convert the chatId to a number:
export default async function ChatDetail({
  params: { chatId },
}: {
  params: { chatId: string };
}) {
  const chat = await getChat(+chatId);

  return (
    <main className="pt-5">
      <Chat id={+chatId} key={chatId} />
    </main>
  );
}
With the component for our parameterized route in place, we can now test it.
Testing the Route
In the browser, navigate to the URL for a specific chat room, such as /chats/3. If the chat exists, you should see the previous messages displayed.
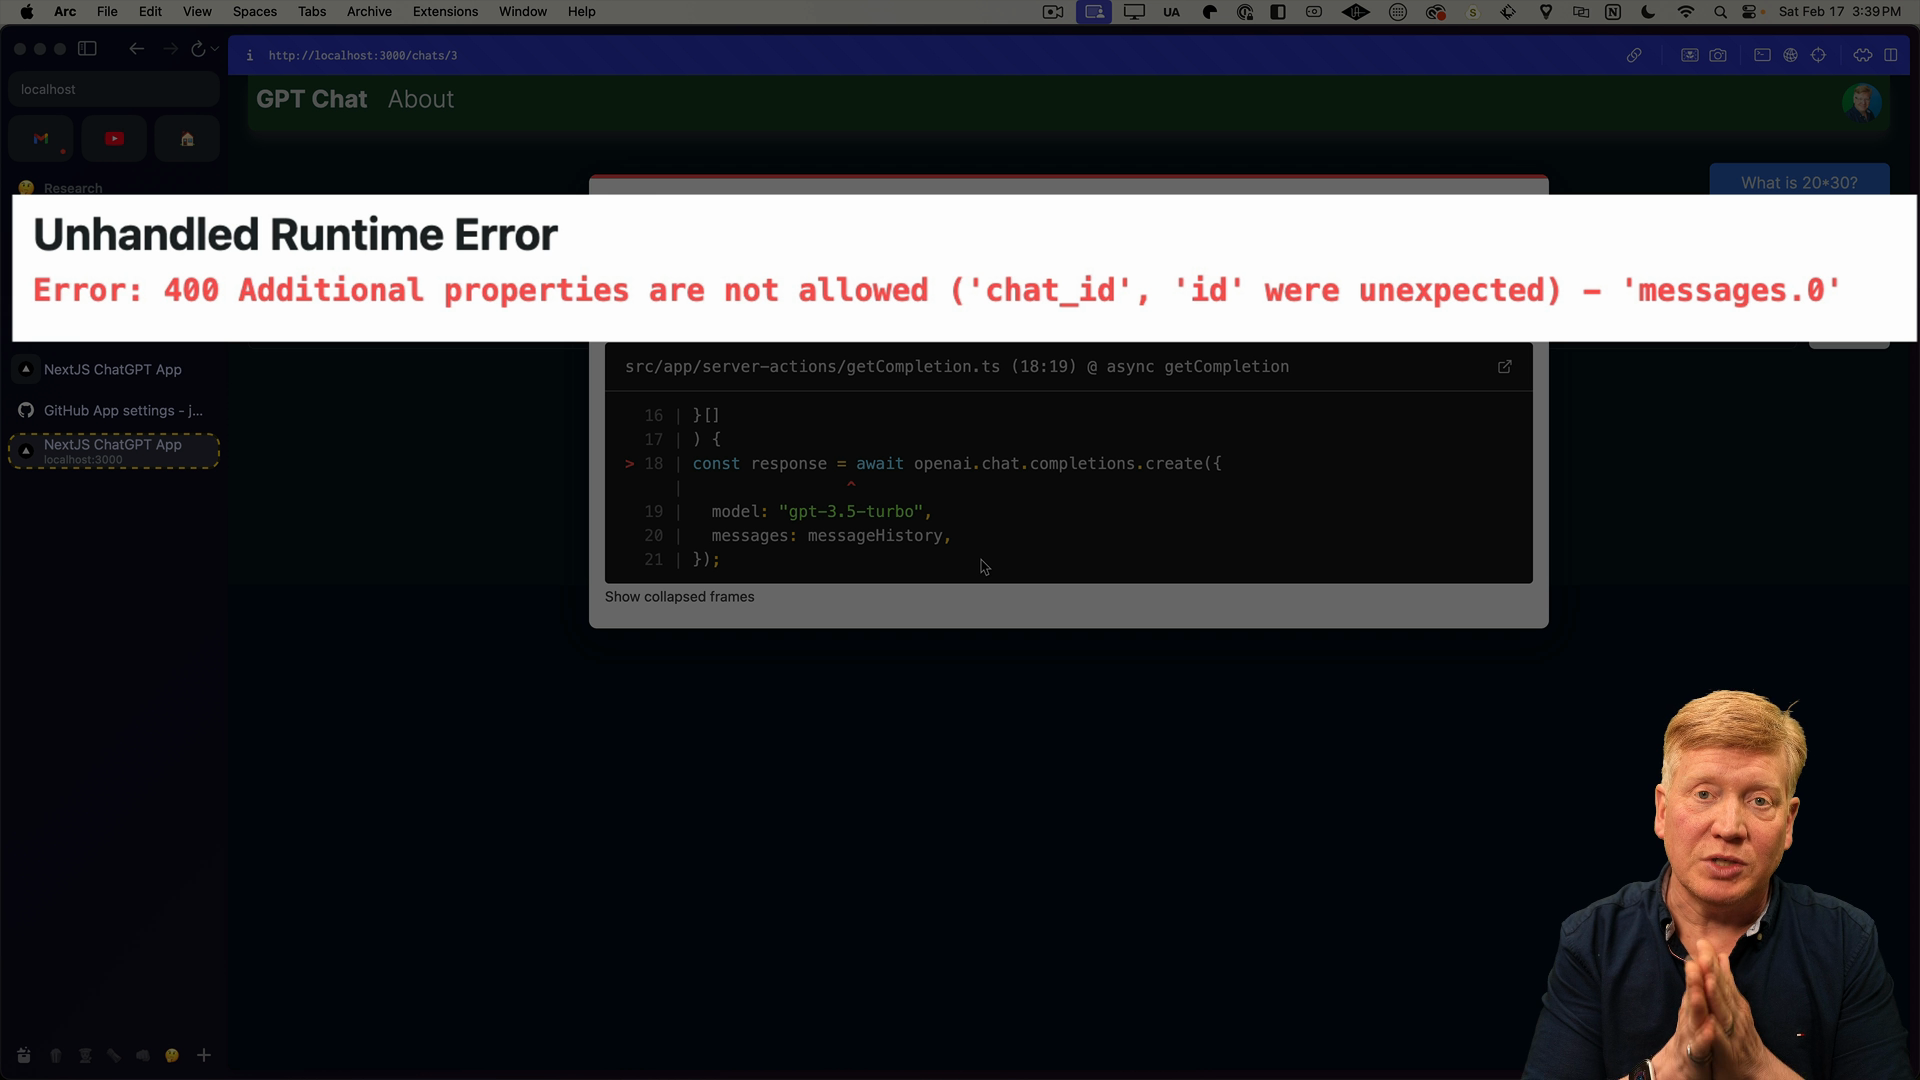
However, when adding a message you might see an error that additional properties are not allowed:

The issue is that OpenAI is receiving extra data on messages. Remember, we're retrieving messages from the database, and these messages come with extra fields such as chat_id and id.
What OpenAI needs, however, is just the role and content. The system is being quite strict about this - while you might assume it could just ignore any additional fields it doesn't need, it seems we actually need to trim down our output to include just what OpenAI expects.
To fix the error, we need to make a slight modification to our getCompletion function. We want to adjust it to accommodate OpenAI's requirements by only passing the role and content fields.
Inside of getCompletion, we'll update the messages object to only include the role and content fields:
// inside getCompletion.ts
const messages = [
  ...messageHistory,
  response.choices[0].message as unknown as {
    role: "user" | "assistant";
    content: string;
  },
];
Upon making these changes, you should be able to successfully calculate and return the response for a simple computation such as "What is 70*80?"
Checking in the database client in the terminal, we can see the that the new message has been added to the chat as expected.
But if we refresh the page in the browser, our new message isn't displayed!
Dealing with Next.js Route Cache
We don't see our new messages because Next.js aggressively caches its routes.
What this means is that Next.js assumes that the data related to any route once it's fetched can be stored and served again if requested. This poses a problem in our scenario because chat data is going to keep changing.
There are a couple of techniques for dealing with this issue, but for now we'll just tell Next.js that this is a dynamic page. This will force Next.js to re-render the component and fetch fresh content each time it's requested.
Back in app/chats/[chatId]/page.tsx, we can specify that this is a dynamic page by exporting a new value called dynamic set to "force-dynamic":
export const dynamic = "force-dynamic";
Upon saving and refreshing, any refreshing of the page will trigger a fresh component rendering process.
Redirecting New Chats
In situations where a new chat is initiated, it would be nice to navigate users to the specific chat page once they receive the first response.
For this use case, the Next.js navigation router comes in handy.
Inside of components/Chat.tsx, import the useRouter hook from Next.js:
import { useRouter } from "next/navigation";
Then inside of the Chat component, create a new variable router and assign it the value of useRouter:
// inside of the `Chat` component above the onClick handler:

let router = useRouter();
With useRouter in scope, it is now possible to programmatically push users to a specified route.
Inside of the onClick handler, after the call to getCompletion we'll check if there wasn't a chatId. If not, we'll push the user to the chat route with the id:
const onClick = async () => {
  const completions = await getCompletion(chatId.current, [
    ...messages,
    {
      role: "user",
      content: message,
    },
  ]);
  if (!chatId.current) {
    router.push(`/chats/${completions.id}`);
    router.refresh();
  }
  chatId.current = completions.id;
  setMessage("");
  setMessages(completions.messages);
};
After saving the file, jump back to the browser and start a new chat.
For example, enter the query "What is one plus five?" Once the response is received, you will be automatically redirected to the appropriate chat page– in this case chats/4.
We know that navigating to a new chat works, but there are some safeguards we need to add.
For example, what should happen when a user attempts to access a chat that doesn't exist? More importantly, what happens when a user tries to access a chat that's not theirs, via the id of that chat?
Checking if a Chat Exists
The initial check we'll add is to find out if a user is requesting a chat that doesn't exist. If the chat is not present in our database, we need to redirect the user accordingly.
For this purpose, Next.js offers a notFound function from its Navigation library. This function is designed to handle 404 errors. Basically, when we don't get a chat from our database, we'll return notFound to signal to Next.js that this is an invalid route:
// inside app/chats/[chatId]/page.tsx

import { notFound } from "next/navigation";
Inside the ChatDetail component, we'll check if the chat doesn't exist and return notFound if it doesn't:
// inside the ChatDetail component

const chat = await getChat(+chatId);
if (!chat) {
  return notFound();
}
Verifying Chat Ownership
The next step in our security measures is to verify if the requested chat actually belongs to the user making the request. To do this, we need to firstly understand who the user is.
Since we're in a React server component, we'll use getServerSession from next-auth. We'll also add the redirect function from the Navigation library:
// inside app/chats/[chatId]/page.tsx
import { redirect, notFound } from "next/navigation";
import { getServerSession } from "next-auth/react";
After we've obtained the chat in the ChatDetail component, we can get the server session. If we don't have a session or the session's email doesn't match the user's email, then we'll redirect the user back to home:
// inside of the ChatDetail component

const session = await getServerSession();
if (!session || session.user.email !== chat.user.email) {
  return redirect("/");
}
Let’s take our chat application one step further by refining the user experience.
Imagine you want to access a specific chat, but you're not currently signed in. Your app should not just redirect you to the home, but rather initiate a sign-in process and then redirect you to your desired destination. This can be done with help from NextAuth middleware.
NextAuth Middleware
Inside the root of the src directory, create a new file called middleware.ts. This file will contain the middleware logic for NextAuth, which will intercept all incoming requests.
In our case, we need to ensure that if a request is made for a specific chat, the user should be logged in.
Inside the file, we'll export default from next-auth/middleware:
// inside srt/middleware.ts

export { default } from "next-auth/middleware";
Then we add a config export that uses a matcher to see if the request is for a specific chat:
export const config = { matcher: ["/chats/:chatid*"] };
Save this file, then restart the dev server.
Testing Route Redirection
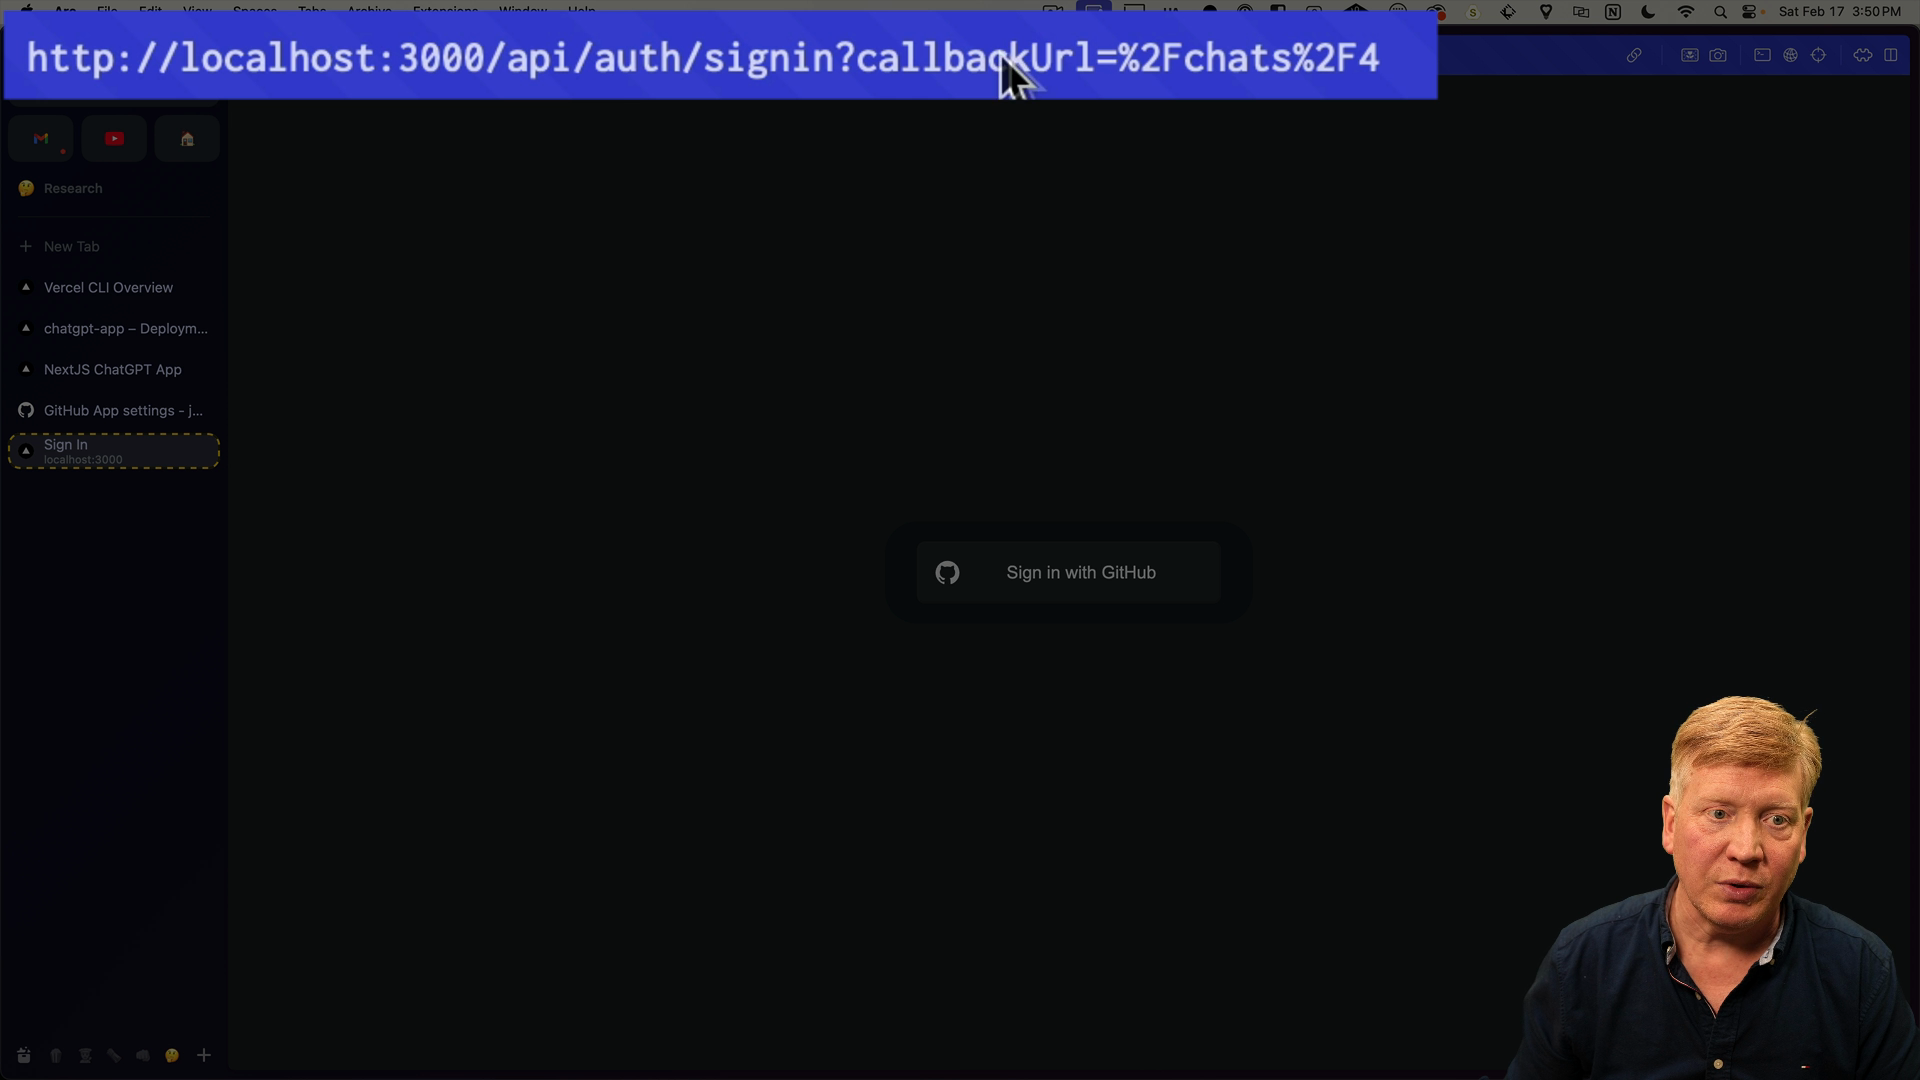
Back in the browser, visit the URL of a specific chat that doesn't exist. This time, instead of being redirected to the home page, you will be redirected to the sign-in page:

After successfully signing in, you will be redirected back to the original chat you requested.
This enhanced user experience is made possible by the callback URL provided by NextAuth after the sign-in process. The callback URL retains the intended destination within the application.
With this feature working, now would be a good time to push an update to GitHub and kick off a new production deployment on Vercel.
Next Steps
In the next lesson, we'll go further into React server components and server-side data fetching in order to add a list of previous chats to the home page of the application.