Keeping bundle size under control is important for maintaining optimal performance. To help with this, we'll use GitHub Actions to automate bundle size checks on pull requests and pushes to the main branch. Additionally, we'll use Husky to run these same checks locally before committing code.
Setting Up a Next.js Project
We'll start by creating a basic Next.js application:
pnpm dlx create-next-app@latest bundle-size-checker --use-pnpm
In this case, the specific name and settings aren't important as we won't actually be running the application itself. Our primary goal is to ensure that the initial application generated by Next.js meets our bundle size requirements and then observe how adding bulky dependencies can cause those checks to fail.
GitHub Repo Setup
Next, we'll create a GitHub repository to host our project and enable the integration of GitHub Actions for automated checks.
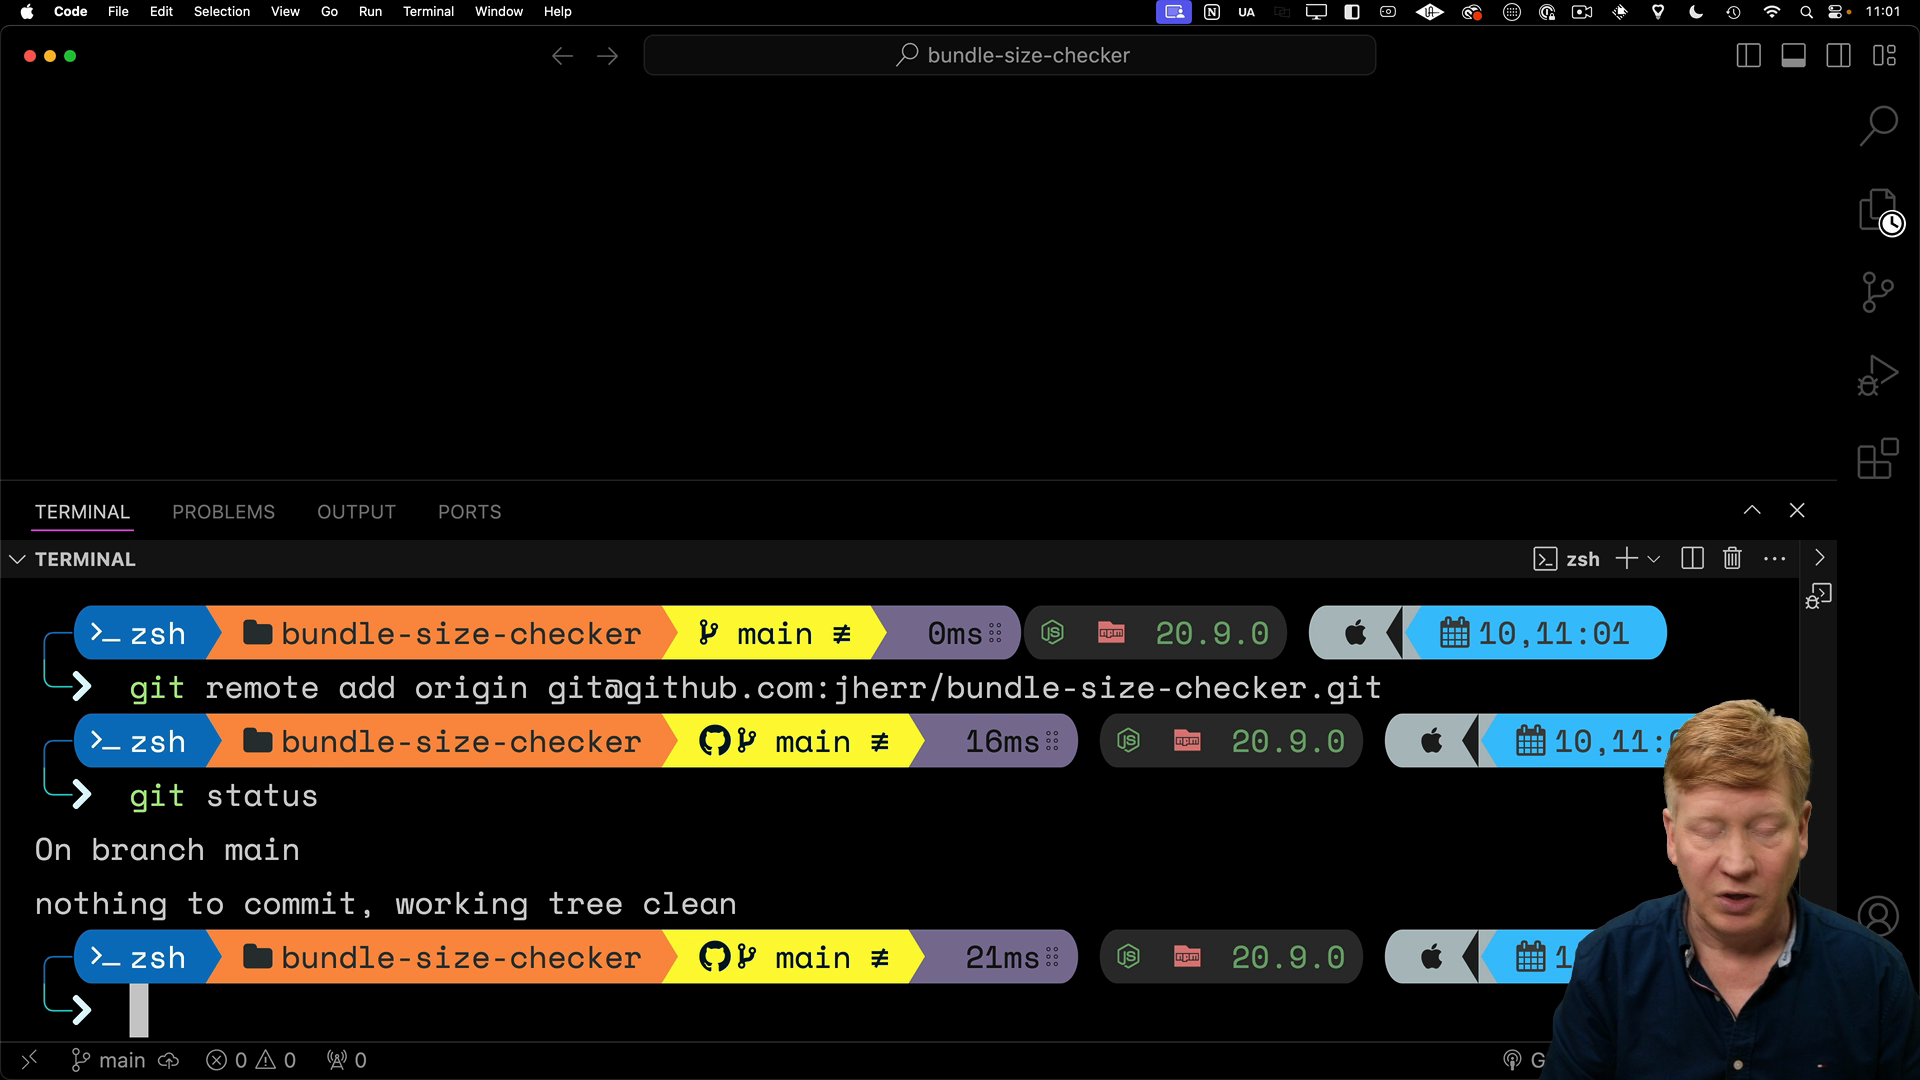
Follow the steps to create a private repo, then push your existing code to the main branch:
Integrate BundleWatch
We'll use a tool called BundleWatch to analyze and monitor our bundle size.
Install BundleWatch as a development dependency:
pnpm add bundlewatch -D
There are multiple ways to configure BundleWatch, but we'll add a section to our package.json file:
// inside package.json
"devDependencies": { ... },
"bundlewatch": {
  "files": [
    {
      "path": ".next/**/*.js",
      "maxSize": "100kB"
    }
  ],
  "ci": {
    "repoBranchBase": "main",
    "trackBranches": [
      "main"
    ]
  }
}
This configuration specifies the files to analyze, the acceptable size threshold, and the branches to track.
The path points to the .next directory, which is where the built files go. The maxSize sets the limit for the bundle size. The ci options rell the tool to only run on the main branch for this project (you will want to adjust this based on your branching strategy).
Once the configuration has been added, build the application:
pnpm build
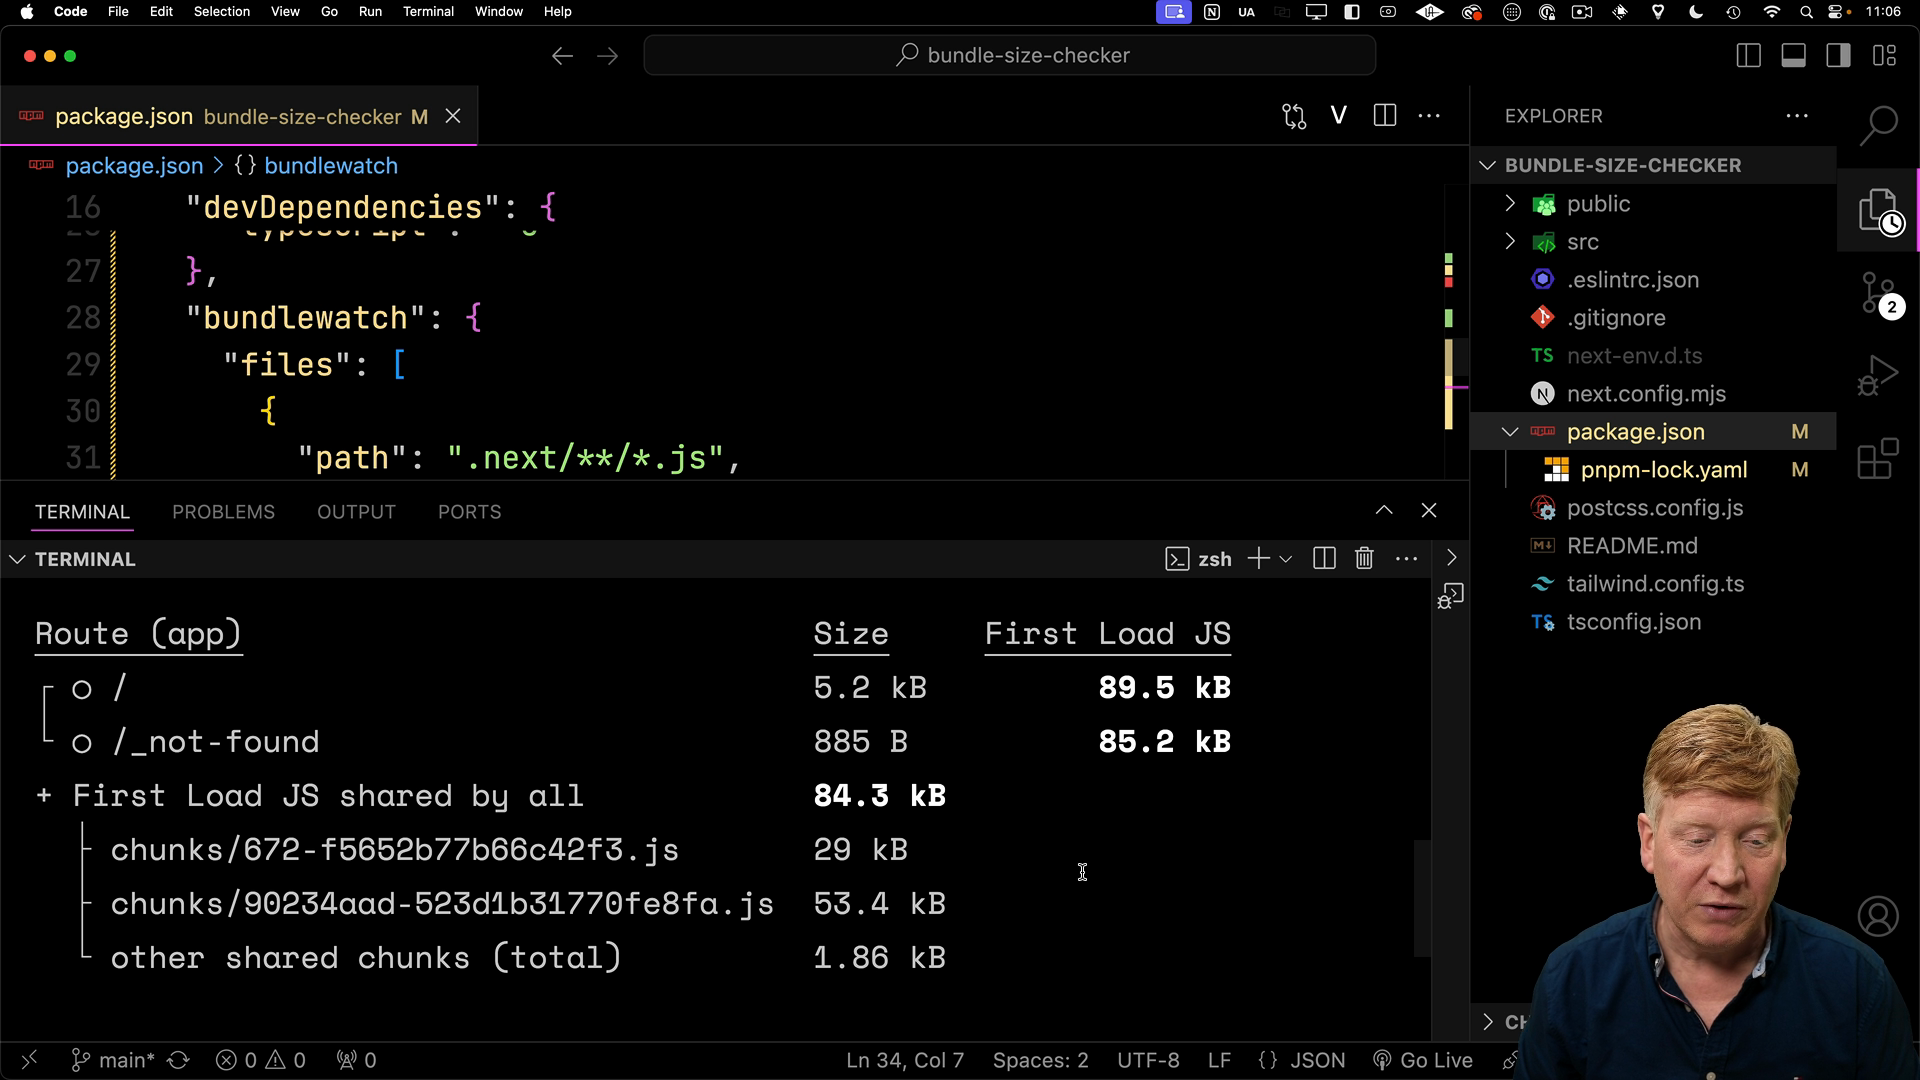
After running the build, we can see that the first load is 89.5kB for the main page.
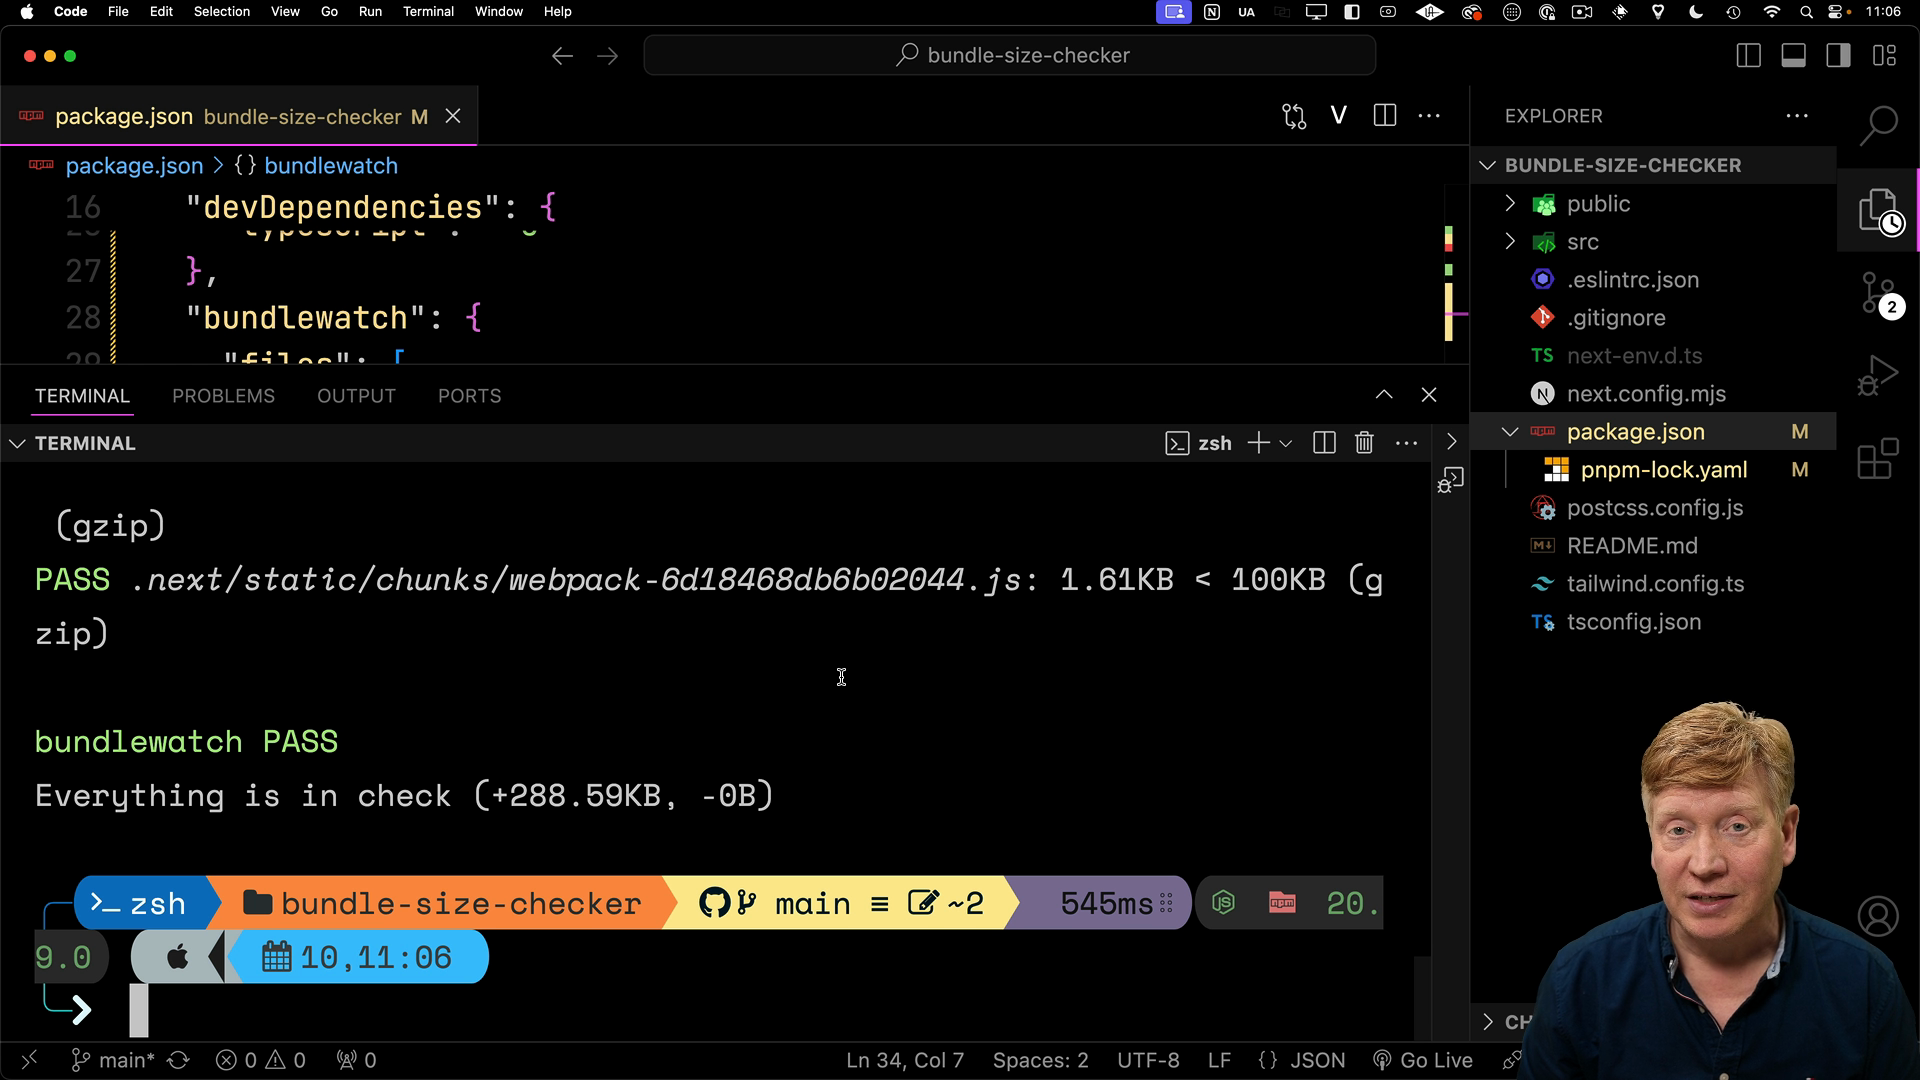
Running BundleWatch will tell us for sure:
pnpm bundlewatch
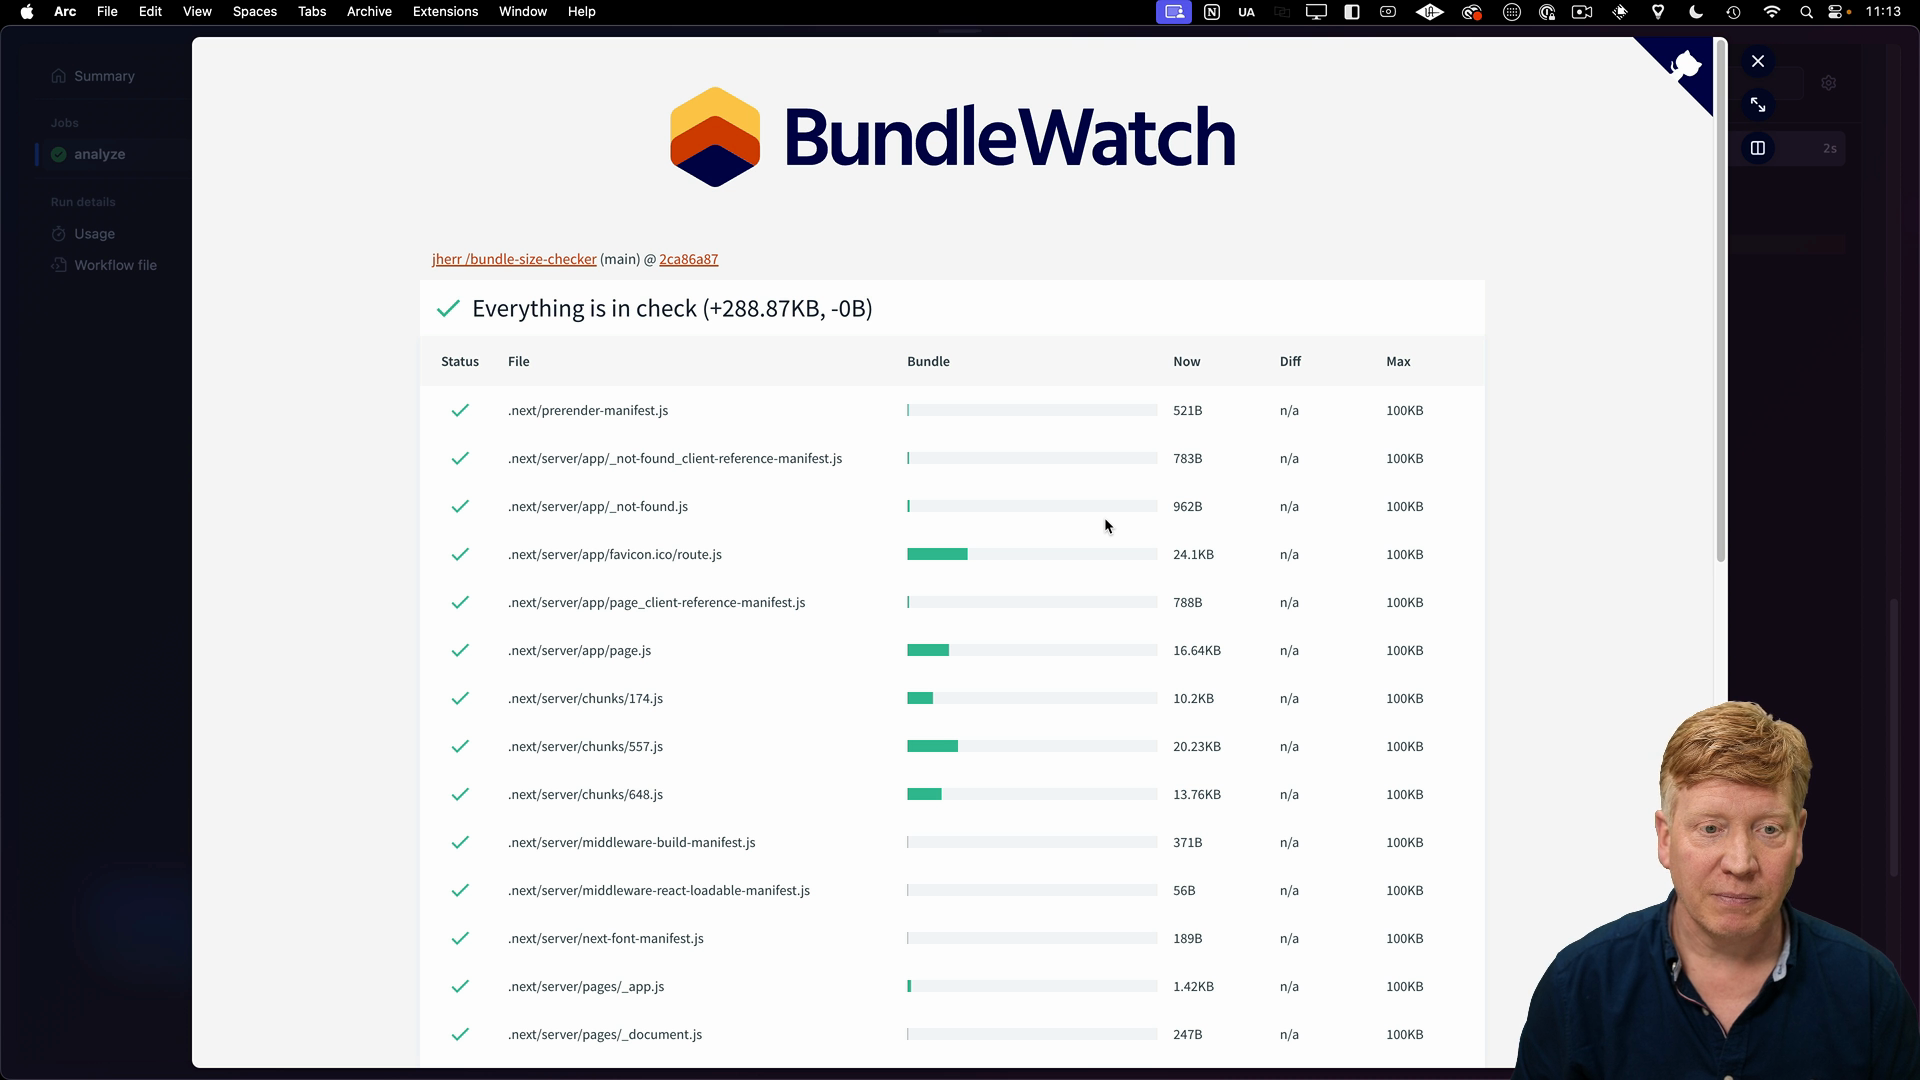
The output will display a report of the bundle sizes for various JavaScript files within the .next directory, comparing them against the specified threshold:
Now that we know BundleWatch works, let's set it up with GitHub Actions.
Implementing GitHub Actions Workflow
The first step is to create a .github/workflows directory in the root of your project. Then within this directory, create a YAML file named bundle-size.yml to define the workflow.
Here's the full file:
name: "Bundle Size Check"

on:
  pull_request:
  push:
    branches:
      - main
  workflow_dispatch:

defaults:
  run:
    working-directory: ./

env:
  CI_REPO_OWNER: jherr
  CI_REPO_NAME: bundle-size-checker
  CI_COMMIT_SHA: ${{ github.sha }}
  CI_BRANCH: main
  BUNDLEWATCH_GITHUB_TOKEN: ${{ secrets.BUNDLEWATCH_GITHUB_TOKEN }}

permissions:
  contents: read
  actions: read
  pull-requests: write

jobs:
  analyze:
    runs-on: ubuntu-latest
    steps:
      - uses: actions/checkout@v3

      - name: Install Node.js
        uses: actions/setup-node@v3
        with:
          node-version: 18

      - uses: pnpm/action-setup@v3
        with:
          version: 8

      - name: Install
        run: pnpm install

      - name: Restore next build
        uses: actions/cache@v3
        id: restore-build-cache
        env:
          cache-name: cache-next-build
        with:
          path: .next/cache
          key: ${{ runner.os }}-build-${{ env.cache-name }}

      - name: Build next.js app
        run: ./node_modules/.bin/next build

      - name: Analyze bundle
        run: pnpm bundlewatch
The on key says that the workflow should run on any pull request, push to the main branch, or manually triggered workflow dispatch.
The defaults section sets the working directory for the workflow. This is ./ in our case, but would be one of the app directories in a monorepo.
The env section of the configuration defines environment variables used in the workflow that should be edited accordingly.
The jobs section contains the steps to be executed. The analyze job checks out the code, installs Node.js, sets up the cache, builds the Next.js app, and runs BundleWatch to analyze the bundle size. These commands are similar to what we ran locally.
Setting Up Environment Variables
Head to the "Settings" section of your GitHub repo. Under the "Secrets and Variables" section is an option for Actions.
Here you can add a new secret named BUNDLEWATCH_GITHUB_TOKEN and paste in the token you obtained from the BundleWatch website.
Running the Action
Once you've saved the configuration, commit changes to the main branch. This will trigger the GitHub Actions workflow to run.
From the repo page, click the Actions tab. You should see the workflow running:
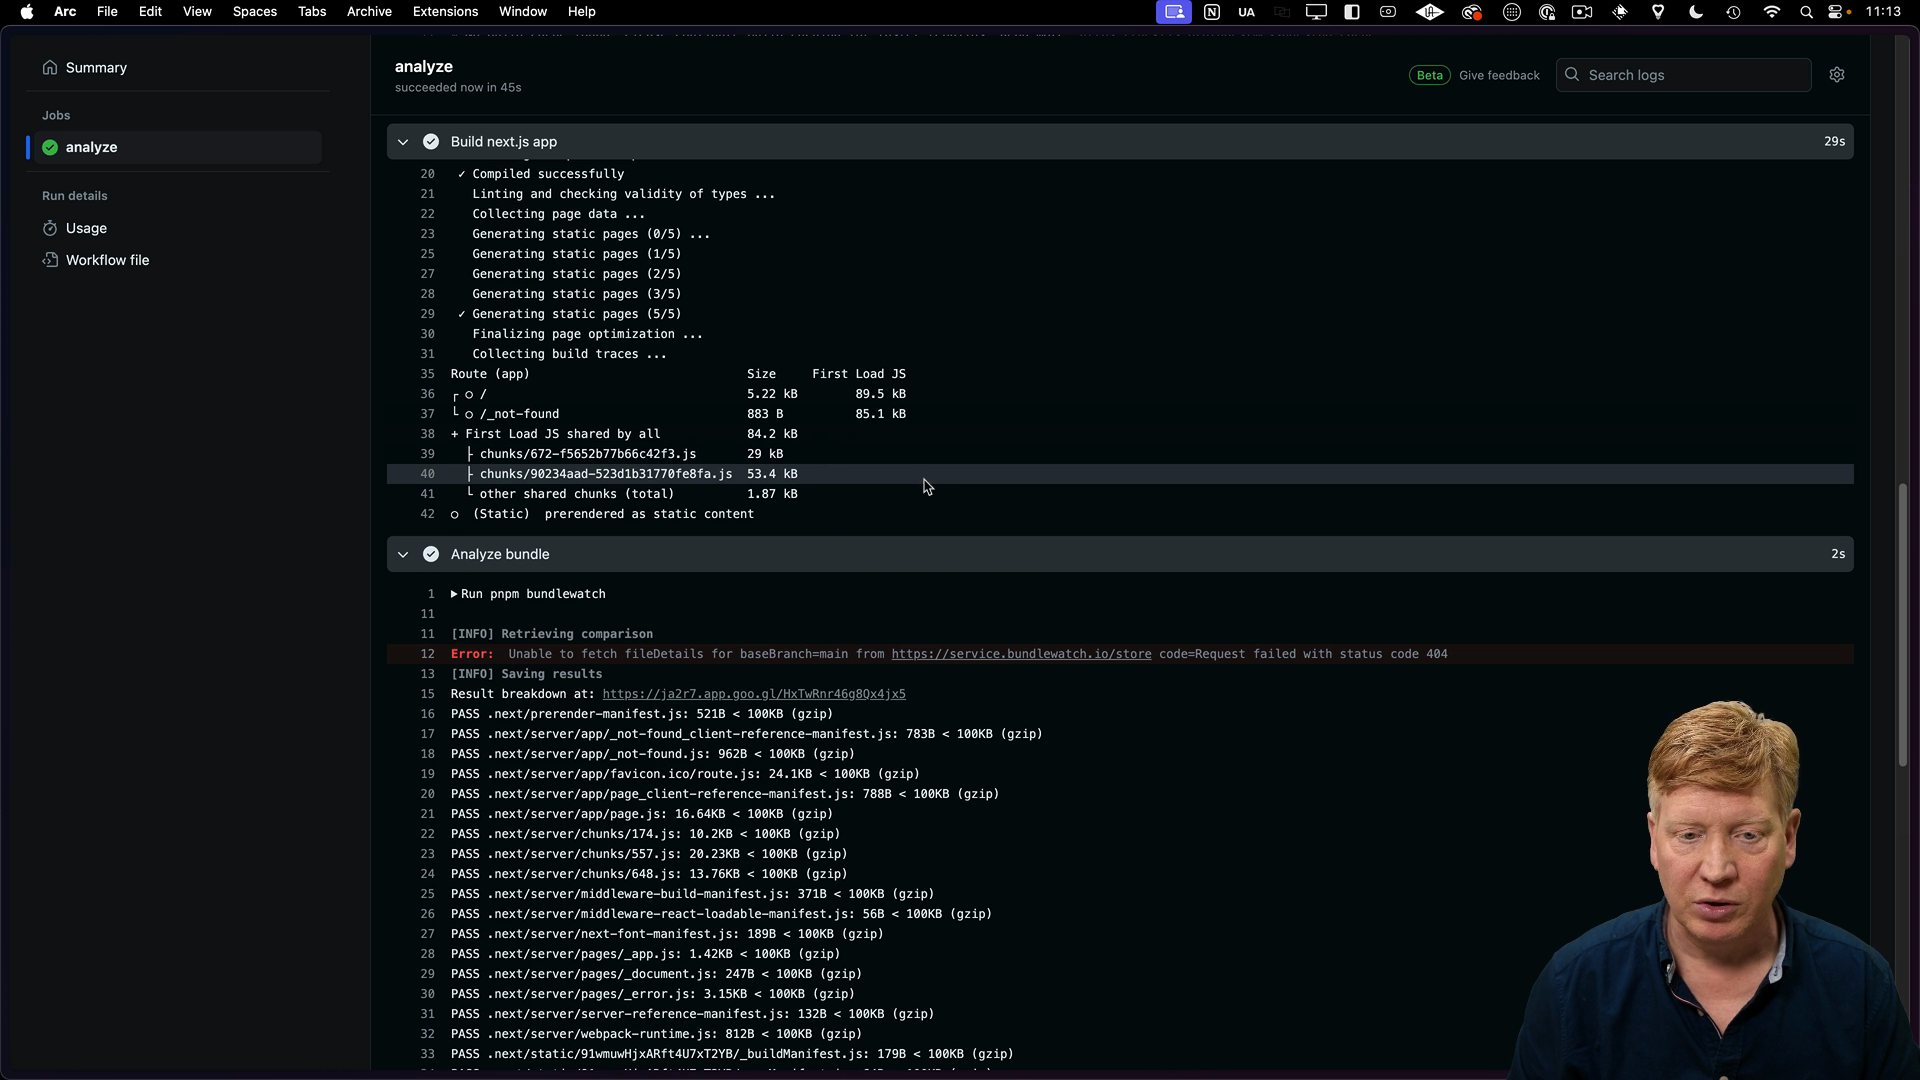
Once the workflow completes, you'll see the results of the bundle size check. If the bundle size exceeds the specified limit, the check will fail, preventing the PR from being merged.
Simulating a Bundle Size Issue
Let's introduce a deliberate bundle size problem to observe how our checks react. We'll improperly import the Material-UI library, which will cause a significant increase in bundle size.
First, install the dependencies:
pnpm add @mui/material @emotion/react @emotion/styled
To create the issue, modify the app/page.tsx file to import the entire Material-UI library:
// inside app/page.tsx

import * as Material from "@mui/material";
Then inside of the Home component, use the Material.Button component:
export default function Home() {
  return (
    <main className="flex min-h-screen flex-col items-center justify-between p-24">
      <Material.Button>Hello world</Material.Button>
      ...
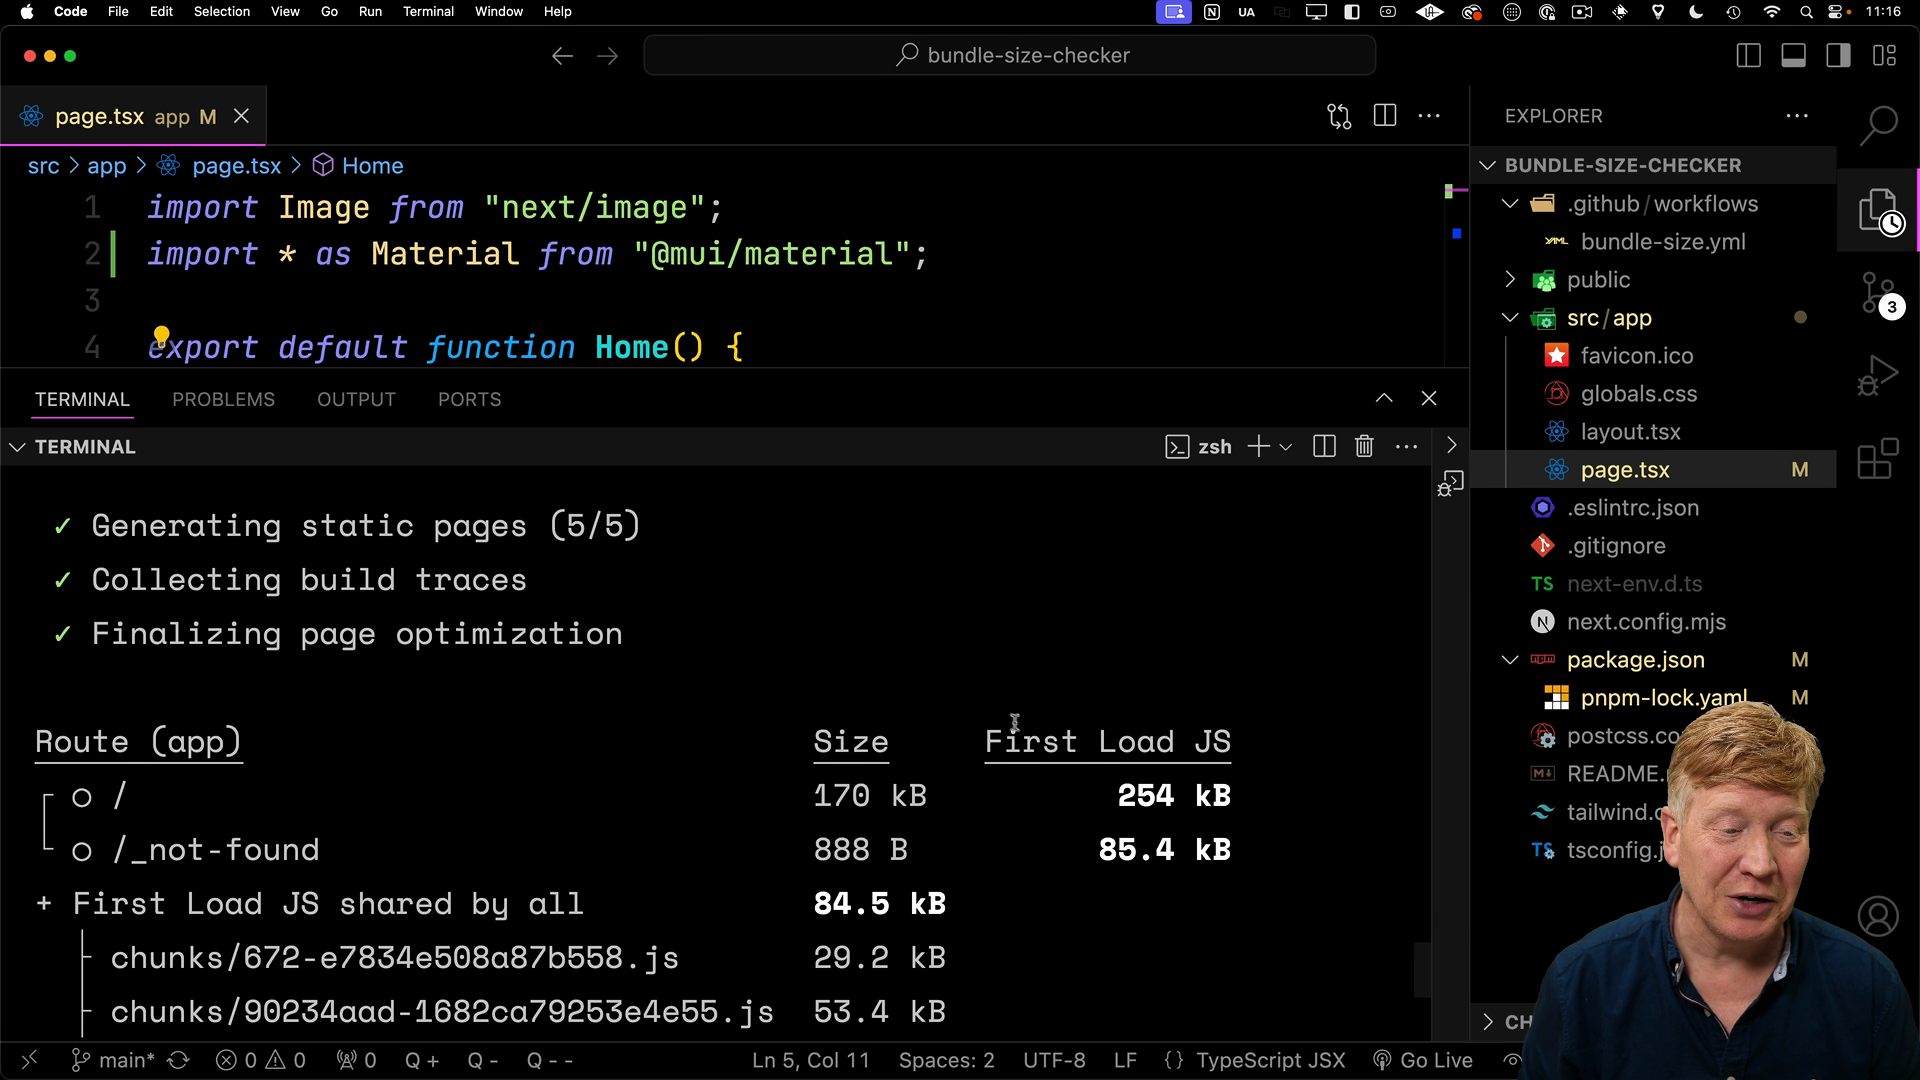
Note that Next.js normally does a good job at tree pruning to only include the necessary parts of a library. However, by importing the entire library, we're bypassing this optimization.
Build the application again:
pnpm build
In the output you'll notice some errors, along with a new bundle size of 254kB:
Now when we run BundleWatch again, we'll see that the check fails due to the bundle size exceeding the 100kB limit:
pnpm bundlewatch
Creating a New Branch
Create a new Git branch and commit the changes, then push the branch to your GitHub repository.
git checkout -b add-material-the-wrong-way
git add -A
git commit -m "Add Material UI the wrong way"
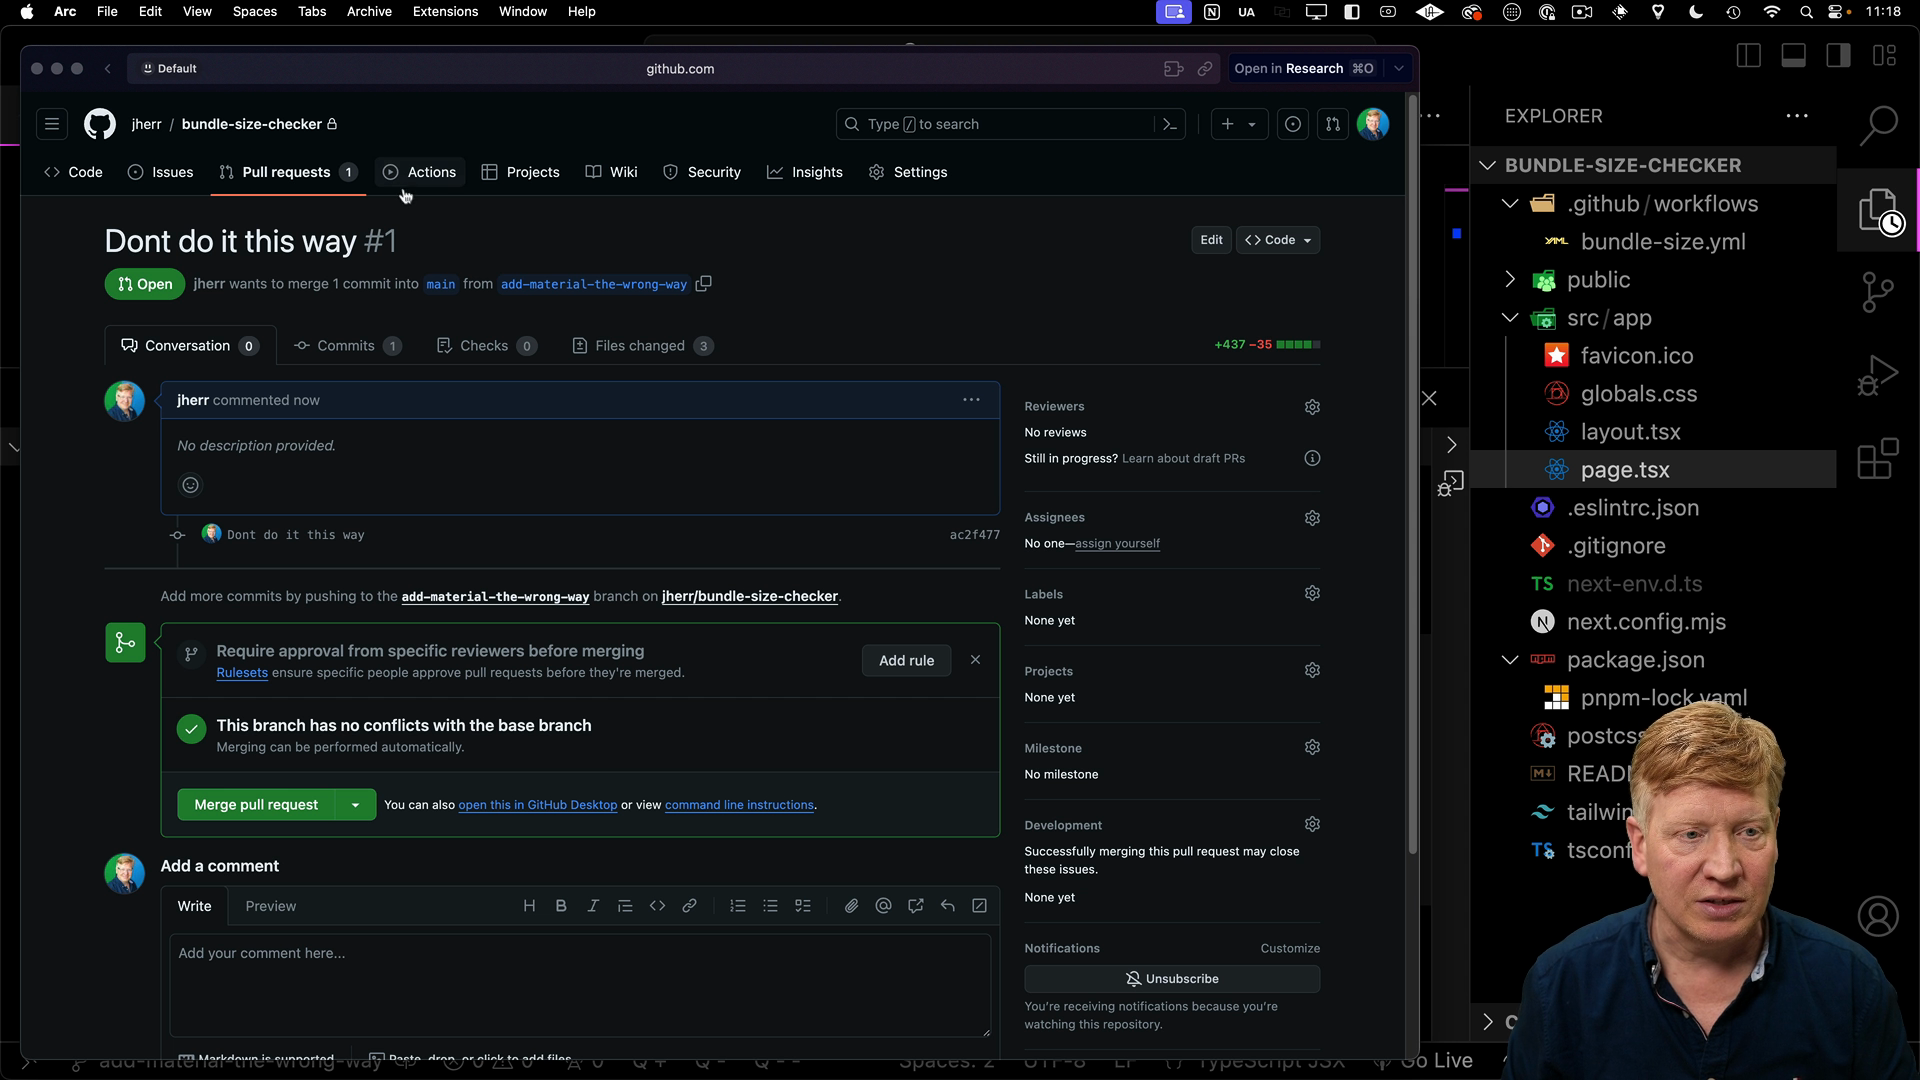
With the changes pushed, create a pull request from this branch to the main branch:
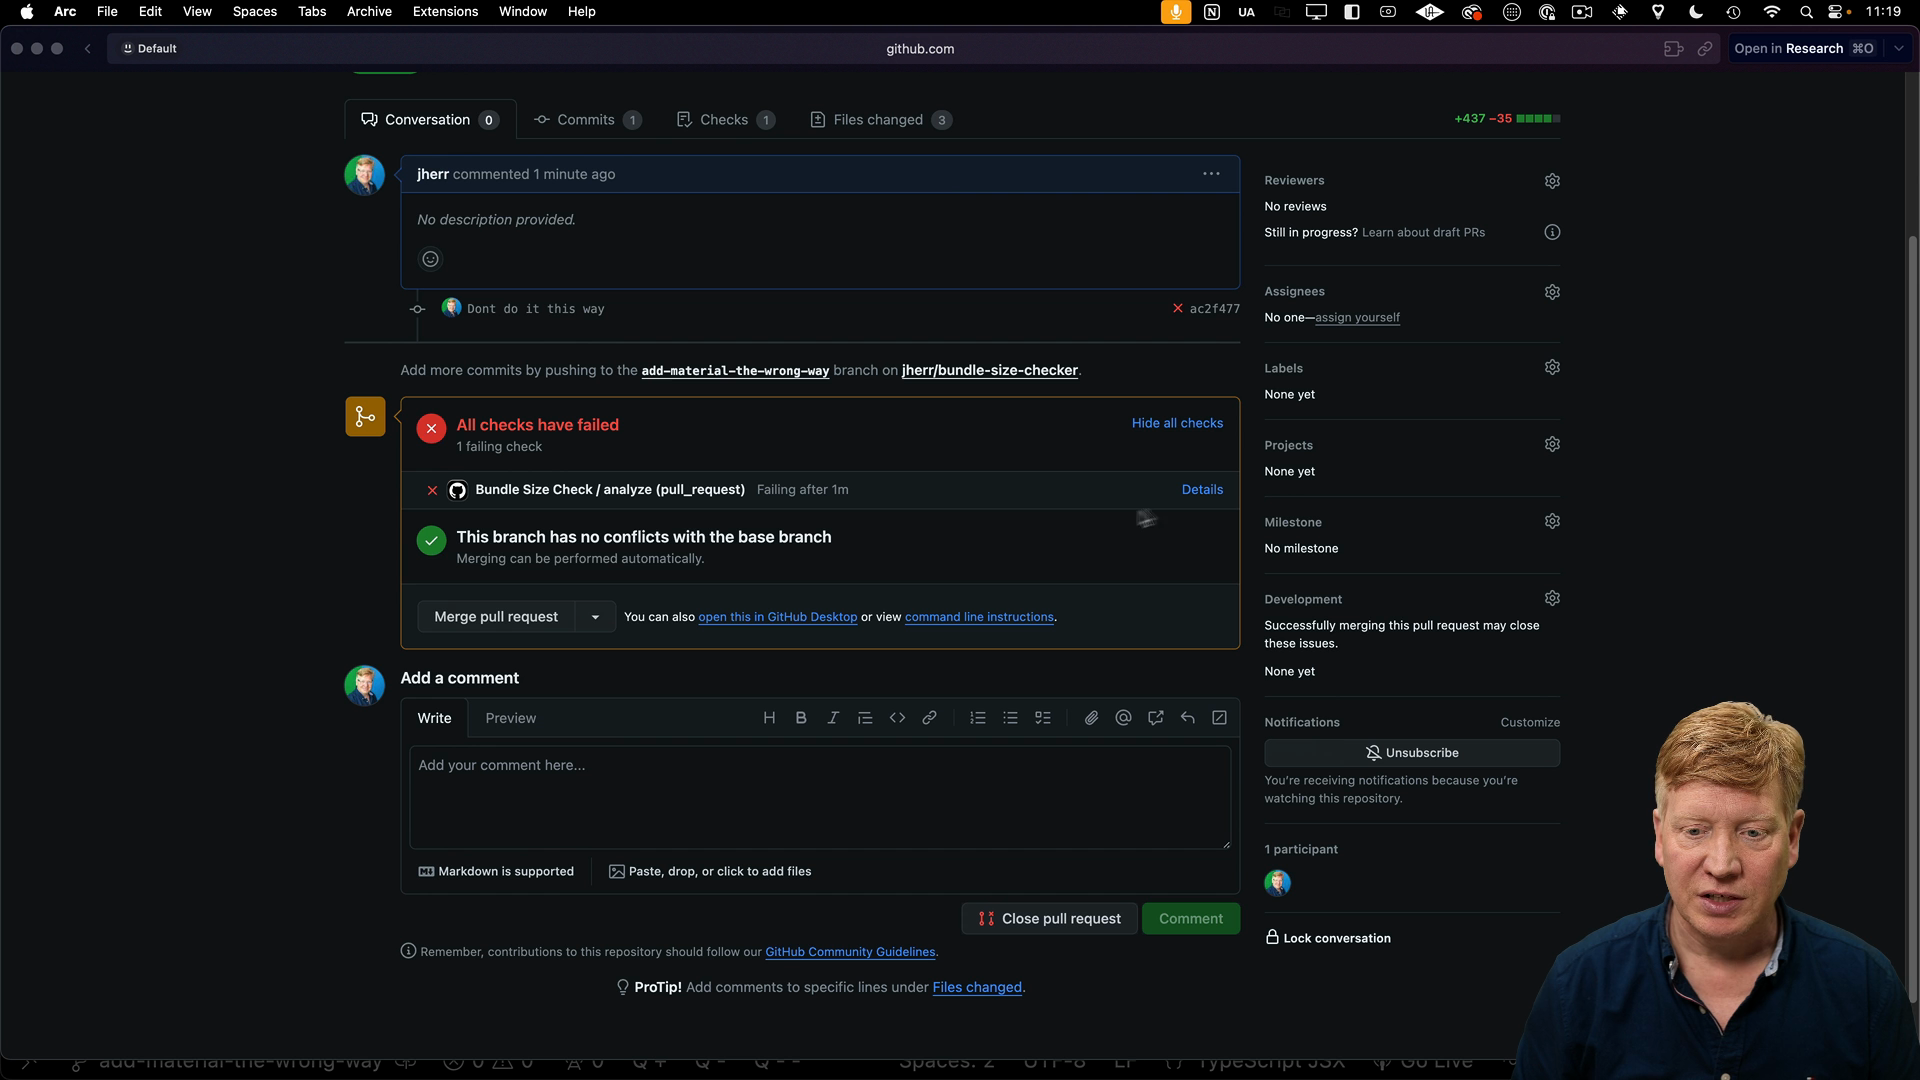
Clicking over to the Actions tab, you'll see the workflow running. It will fail due to the bundle size violation.
Because the bundle size check failed, the PR cannot be merged until the issue is resolved. This process helps maintain a healthy bundle size and prevents performance issues from creeping into your application.
Local Checks with Husky
In order to catch potential bundle size issues before even creating a pull request, we can integrate Husky, a tool for managing Git hooks.
First, run the following command to initialize Husky:
npx husky init
This will create a .husky/pre-commit file, and add a prepare script to your package.json file.
We need to add a couple test scripts to package.json in order to have Husky run them:
// inside package.json
"scripts": {
  ...
  "prepare": "husky",
  "test": "pnpm run test:bundle-size",
  "test:bundle-size": "bundlewatch"
},
Then inside of the generated .husky/pre-commit file, we'll execute the build and test scripts:
// inside .husky/pre-commit
npm run build
npm test
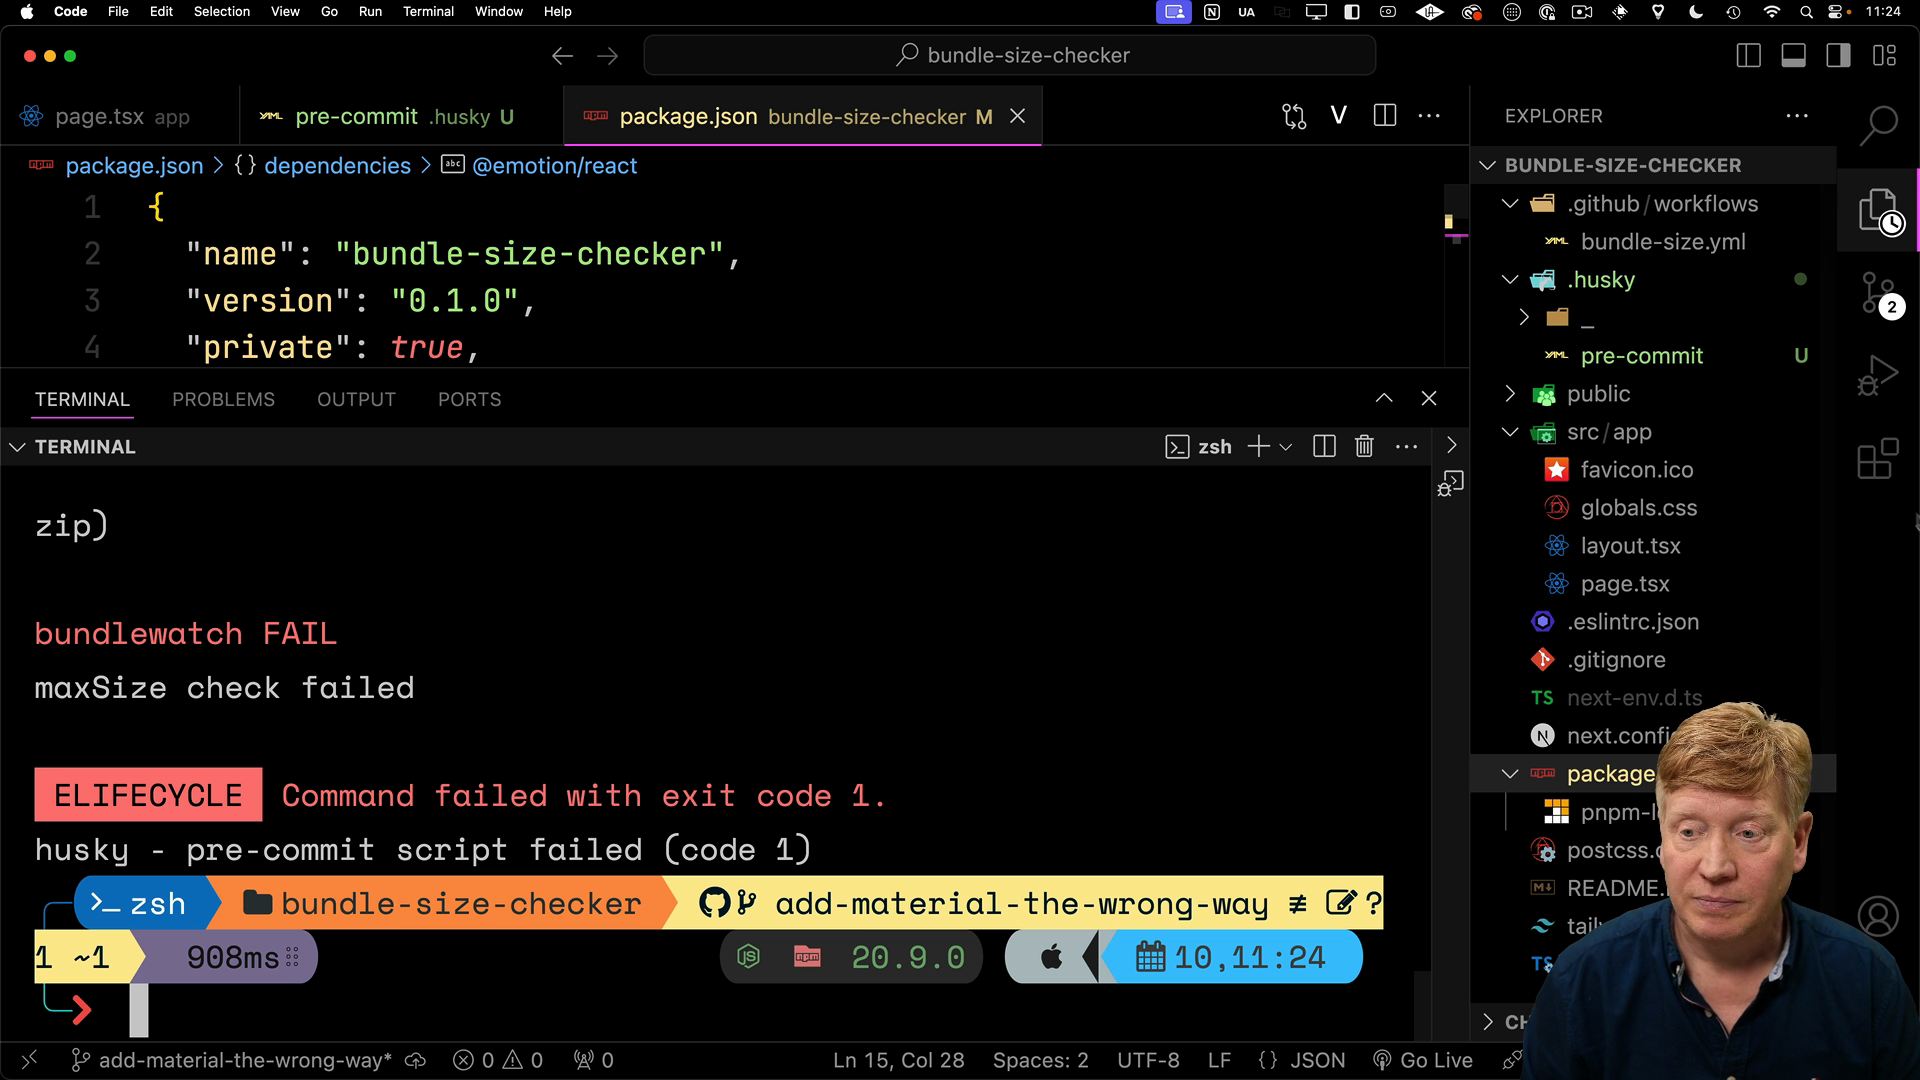
Now when trying to make a commit, Husky will run the build and bundle size checks before allowing the commit to proceed. If the bundle size exceeds the limit, the commit will be blocked:
Summary
By implementing bundle size checks using tools like BundleWatch and Husky, and automating them through GitHub Actions, we establish a proactive approach to maintaining performant Next.js applications. These techniques can also be applied to other types of checks you want to enforce in your development workflow.