In this section, we'll begin developing our application by creating a Next.js app locally. This approach closely mirrors the development process you'd experience on the job.
NOTE: The command to install shadcn/ui is pnpm dlx shadcn@latest init when using pnpm
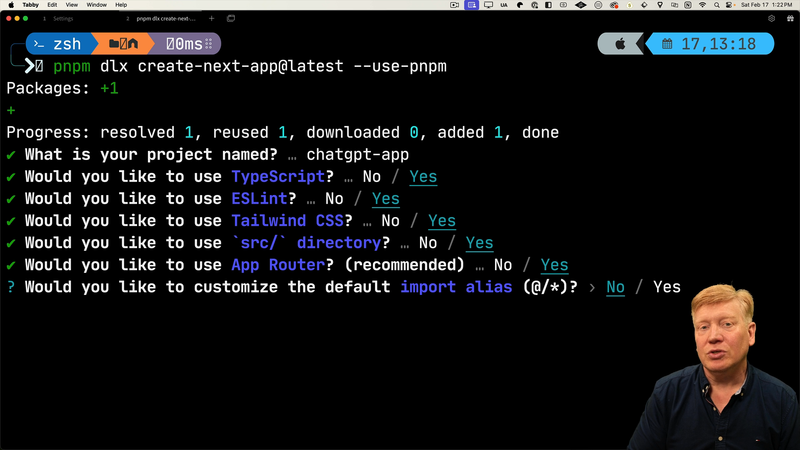
To get started, create a new Next.js application locally using your preferred package manager. In this walkthrough, we use pnpm to create the app:
pnpm dlx create-next-app@latest chat-gpt-app --use pnpm
The command above uses pnpm and dlx to create a new next.js application. The @latest flag ensures the most recent version of next.js is installed. The chat-gpt-app argument names the app, and the --use pnpm flag ensures pnpm is used throughout.
After running the command, you'll move through a series of prompts.
Choose TypeScript and ESLint according to your preference. Considering the UI components will be styled with the shadcn toolkit, which builds on top of Tailwind CSS, select Tailwind CSS when asked about styling. To keep your main directory tidy, select 'yes' when asked if everything should be in a source directory.
Make sure to choose App Router. It's now the recommended router application, replacing the older Pages Router. Don't customize the import alias, so it stays relative to the source directory.

With the setup complete, open your app in your preferred code editor.
Now, let's start the development server. Using the terminal, navigate to the newly created directory and start the server with the 'dev' script:
cd chat-gpt-app
pnpm run dev
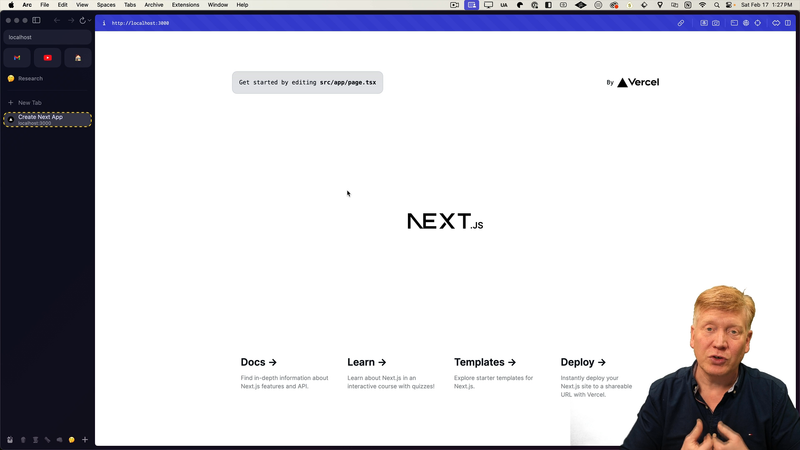
Navigate to localhost:3000 in your browser, and you should see the Next.js starter page.
In your app's package.json file, you'll find other scripts, such as 'build', which processes your code for production and saves it in the .next directory. To start the production build server, use the 'start' script. There's also a lint script available that runs ESLint.
Adding shadcn
Next, you'll want to setup shadcn, the toolkit you'll use to create UI components.
To do so, switch back to your terminal and stop the dev server, then run the following command:
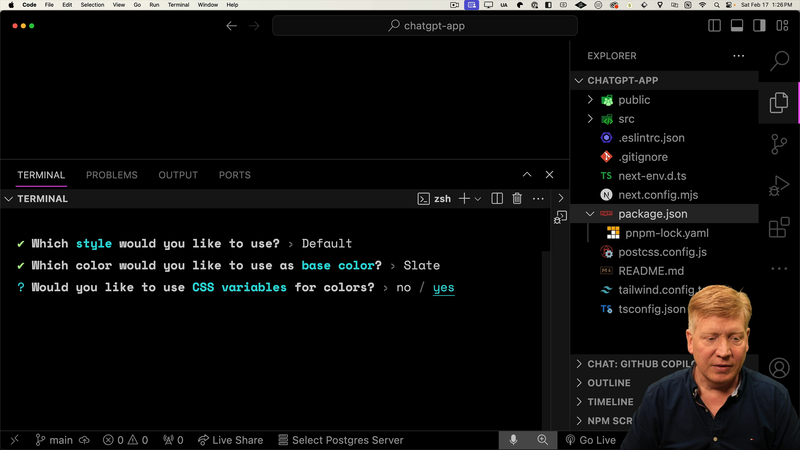
pnpm dlx shadcn@latest init
You'll be prompted to input your style preferences.

After initializing shadcn, a new file named components.json will be created.
This file tells us that shadcn will store the code inside of the@components directory.
A @lib directory is also created, which includes a utility for concatenating class names. shadcn also updates your Tailwind configuration to include the CSS variables you set up.
You can verify the shadcn setup by restarting your dev server and refreshing the page. A stark white page should greet you.

If you prefer working in dark mode, you can enforce this by applying the Tailwind dark class to the body.
Inside of globals.css, add the following CSS:
body {
  @apply dark;
}
Updating the Home Page and App Title
Inside of src/app/page.tsx we can remove the default starter markup and replace it with a "Welcome to GPT Chat" message:
export default function Home() {
  return (
    <main className="p-5">
      <h1 className="text-4xl font-bold">Welcome To GPT Chat</h1>
    </main>
  );
}
Next, update the title to display "Welcome to GPT Chat". This can be done in src/app/layout.tsx inside of the metadata object:
export const metadata: Metadata = {
  title: "Create Next App",
  description: "Generated by create next app",
}
Refreshing the browser, we can see the changes took place.
Note that any metadata changes needed later can be done on a per-route basis!
Deploying the Application to Production
Next.js applications are easily deployed on Vercel, which offers a free plan.
To start the process, you'll need to push your code to GitHub.
After creating a new repository (for example, 'chat-gpt-app'), add your existing Next.js files to it from the terminal:
git add .
git commit -m "First commit"
git remote add origin https://github.com/username/chat-gpt-app.git
git push -u origin master
Once you've pushed the changes, log in to Vercel using your GitHub account.
On the Vercel dashboard, you'll see all of your GitHub repos. Select the one you've just created and hit 'Deploy'. Don't worry about changing any of the default settings at this point.
And that's it! Your application is now live and accessible using the generated Vercel URL.
Moving forward, each step of our app development will be deployed to production, replicating real-world development.
In the next section, we'll work with layouts and create our first route.