ProNextJS
    lesson

    Cached Server Actions in Next.js

    Jack HerringtonJack Herrington

    Next.js server actions can return more than just data– They can actually return UI! This is a really cool feature built into App Router that not everyone knows about.

    In this lesson we'll work through a real world example based on an actual use case where server actions are used to cache portions of a content site.

    Note: this is a very advanced technique and I strongly recommend that you only use it if you really need it!

    Understanding the Problem

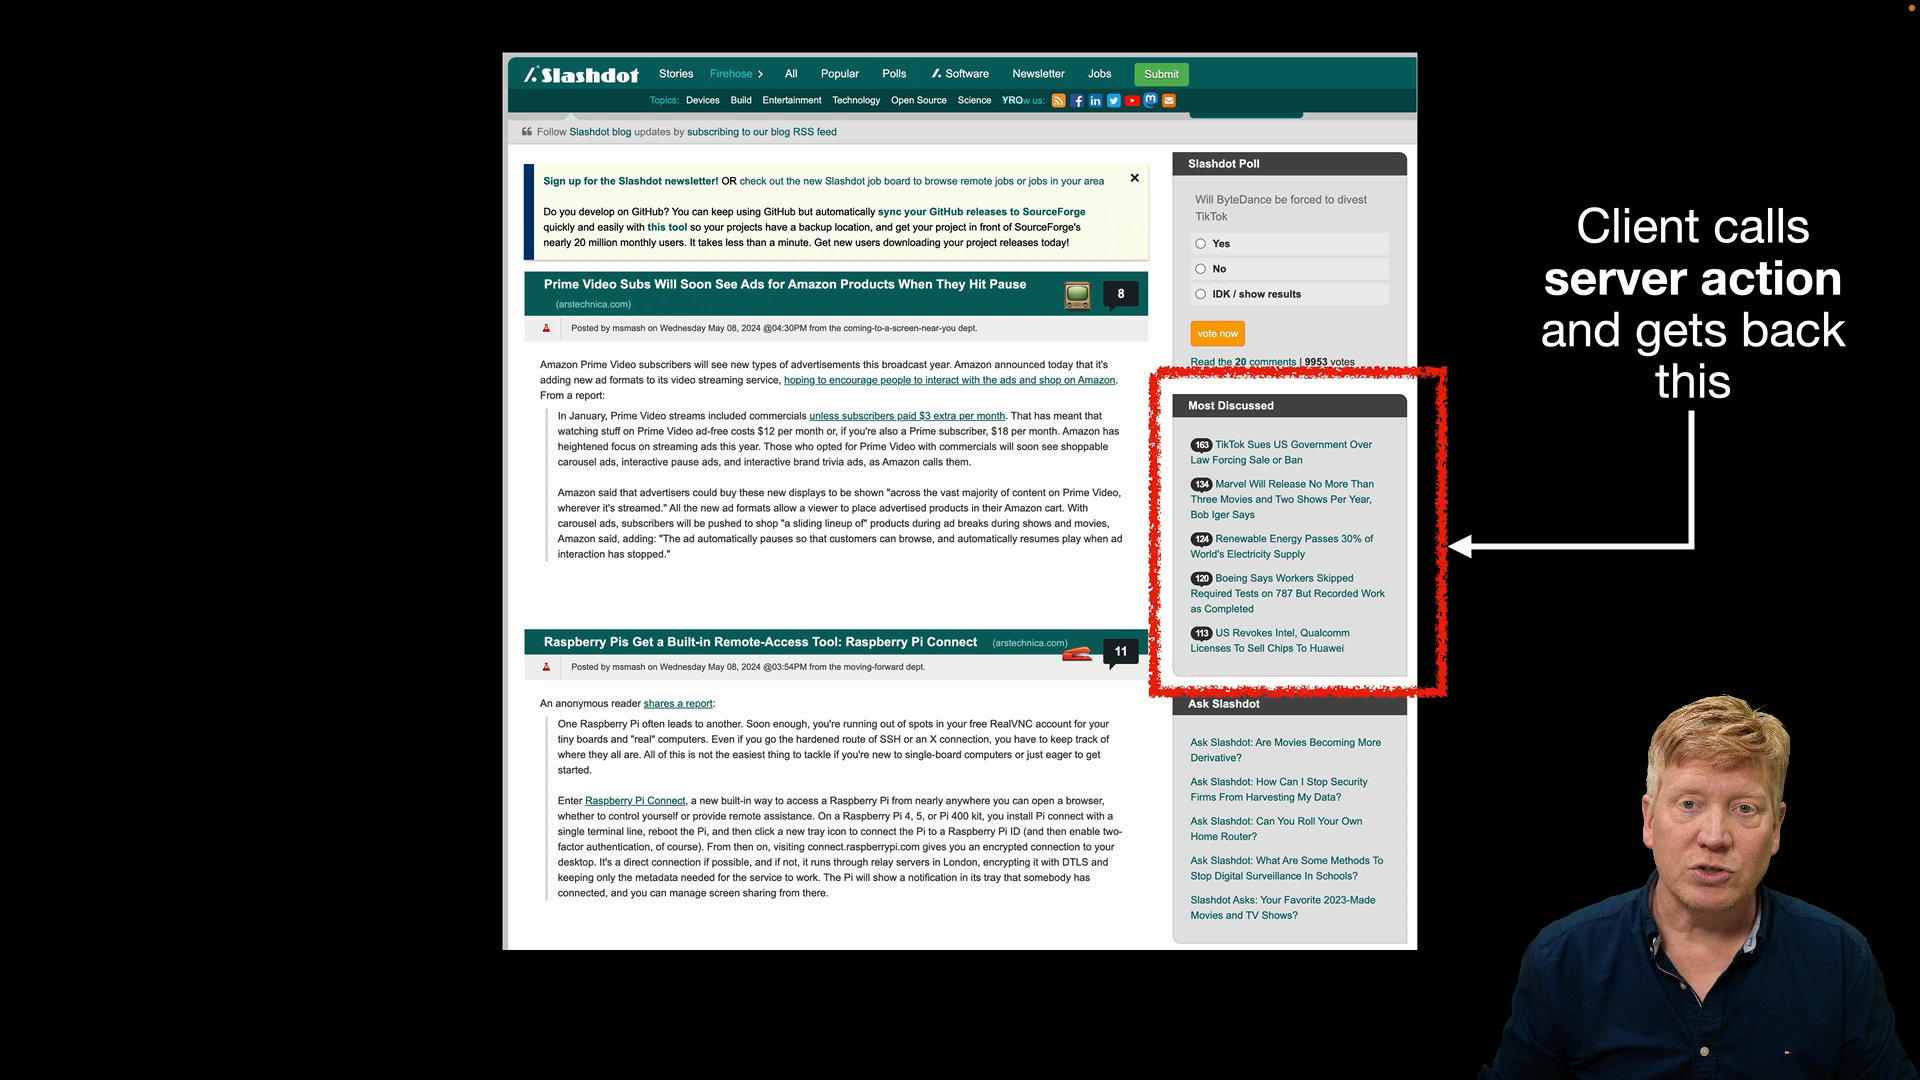
    Let's imagine we're building a site like Slashdot. Typically, high-traffic sites use a CDN (Content Delivery Network) to handle a lot of the requests and reduce the load on their servers.

    Here's how it works:

    1. The client makes a request to Slashdot.
    2. The CDN intercepts the request.
    3. If the CDN has the page cached, it returns it.
    4. If not, the CDN forwards the request to the origin server (our Next.js app).
    5. The Next.js server returns the page to the CDN.
    6. The CDN caches the page and returns it to the client.

    This is great because it takes a lot of pressure off of our Next.js server, but it usually works on the whole page level.

    What if we want to cache only a section of a page, like a "Most Discussed" section? That's where server actions come in!

    Server Actions to the Rescue

    Remember how server actions can return UI? We can use that to our advantage.

    For example, we can have server actions like this:

    async function getCounter(start: number) {
      "use server";
      return <Counter start={start} />;
    }
    
    async function getTimer() {
      "use server";
      return <Timer />;
    }
    

    We can return static HTML, a combination of static HTML and client components, or even full client components.

    Continuing with the Slashdot example, let's say we have a client component for the "Most Discussed" section.

    Slashdot most discussed section

    Here's how it can work with a server action:

    1. The client component makes a server action request to get the "Most Discussed" content.
    2. The server action returns the rendered HTML or client components for that section.
    3. The client component renders the received content.

    Now, let's break down how server actions work under the hood.

    How Server Actions Work

    Server actions work by having the client send a POST request to the same route it's on, but with a special header called Next-Action.

    The Next.js server, seeing this header, knows to execute the server action instead of a normal page request. It does the work, gets the content, and sends it back to the client.

    flight data

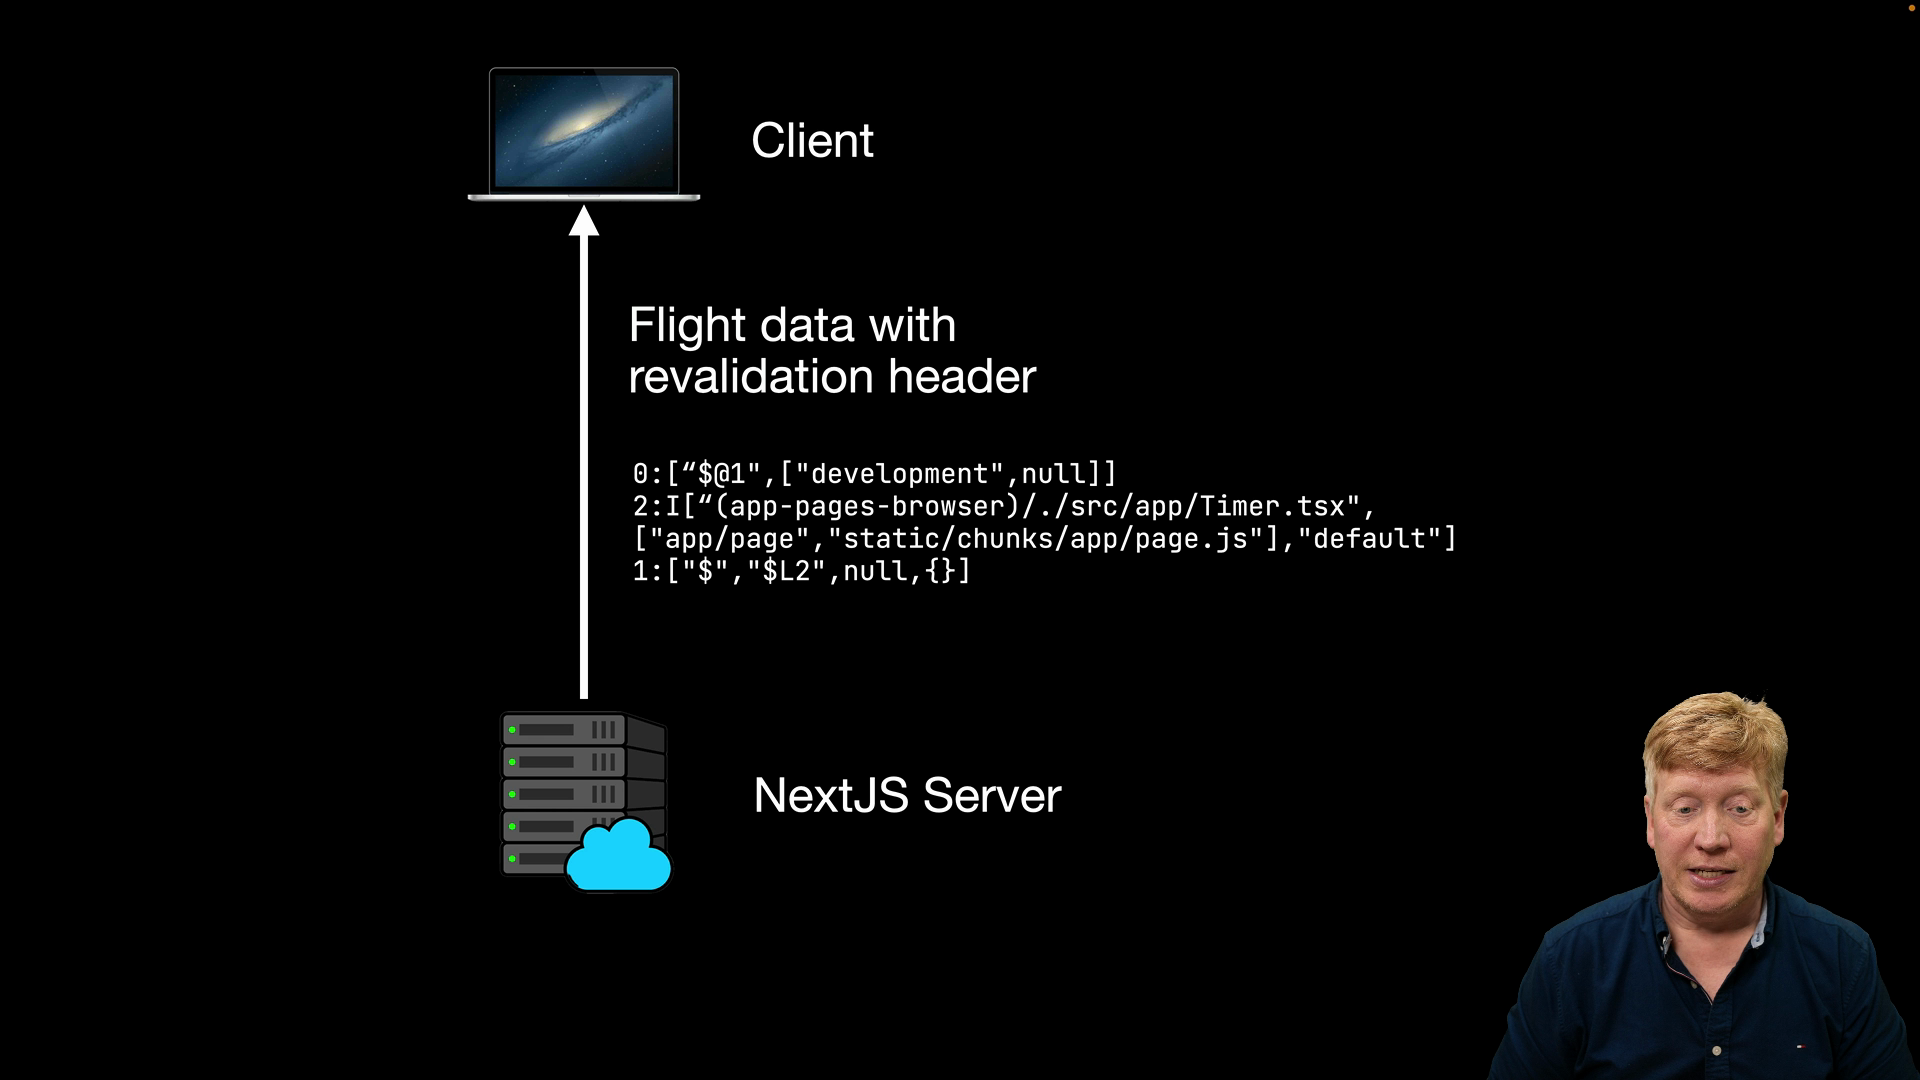
    What gets sent back to the client is "flight data", essentially a serialized version of the UI that's ready to be hydrated on the client-side.

    Our Goal: Caching with Server Actions

    We're going to combine these concepts to cache server action responses at a more granular level. Here's the plan:

    First, intercept the client's server action request and create a unique hash based on the request (including any arguments passed to the server action). This hash will be used as a key for caching the server action response.

    If the hash is found in the cache, return the cached response. If not, let the request go through to the Next.js server, cache the response, and then return it to the client.

    Normally, CDNs don't cache any POST, PUT, PATCH, or DELETE requests, so there would be special configuration needed to make this work in a real-world scenario.

    Since we don't have a real CDN handy for this example, we'll use a simple Express app to act as our CDN simulator. This simulator will sit between our Next.js app and the client, intercepting and potentially caching server action requests.

    Code Breakdown

    Here's a breakdown of the steps involved in implementing this caching mechanism.

    Basic Next.js App

    The starter app can be found in the repo at 05-cacheable-server-actions/cdn-simulator/starter/.

    The home page component includes a simple Next.js app with a Counter and Timer component:

    // inside cdn-simulator/starter/src/app/page.tsx
    
    import Counter from "./Counter";
    import Timer from "./Timer";
    
    export default function Home() {
      return (
        <main>
          <Counter start={10} />
          <Timer />  
        </main>
      );
    }
    

    Creating Server Actions

    In order to get things working, we'll create server actions for getCounter and getTimer that return the components rendered on the server:

    export default function Home() {
      async function getCounter(start: number) {
        "use server";
        return <Counter start={start} />;
      }
    
      async function getTimer() {
        "use server";
        return <Timer />;
      }
      ...
    

    Create a Client-Side Component

    Let's create a new ClientContentSection component that will take the server actions and invoke them on a useEffect hook with an empty dependency array:

    // inside src/app/ClientContentSection.tsx
    
    "use client";
    import { useState, useEffect } from "react";
    
    export default function ClientContentSection({
      onGetCounter,
      onGetTimer,
    }: {
      onGetCounter: (start: number) => Promise<React.ReactNode>;
      onGetTimer: () => Promise<React.ReactNode>;
    }) {
      const [counter, setCounter] = useState<React.ReactNode>(null);
      const [timer, setTimer] = useState<React.ReactNode>(null);
    
      useEffect(() => {
        (async () => {
          setCounter(await onGetCounter(10));
          setTimer(await onGetTimer());
        })();
      }, []);
    
      return (
        <>
          <div>{timer}</div>
          <div>{counter}</div>
        </>
      );
    }
    

    Now we can update the Home component to use the ClientContentSection:

    // inside src/app/page.tsx
    
    // rest of Home component as before
    return (
      <main>
        <ClientContentSection onGetCounter={getCounter} onGetTimer={getTimer} />
      </main>
    )
    

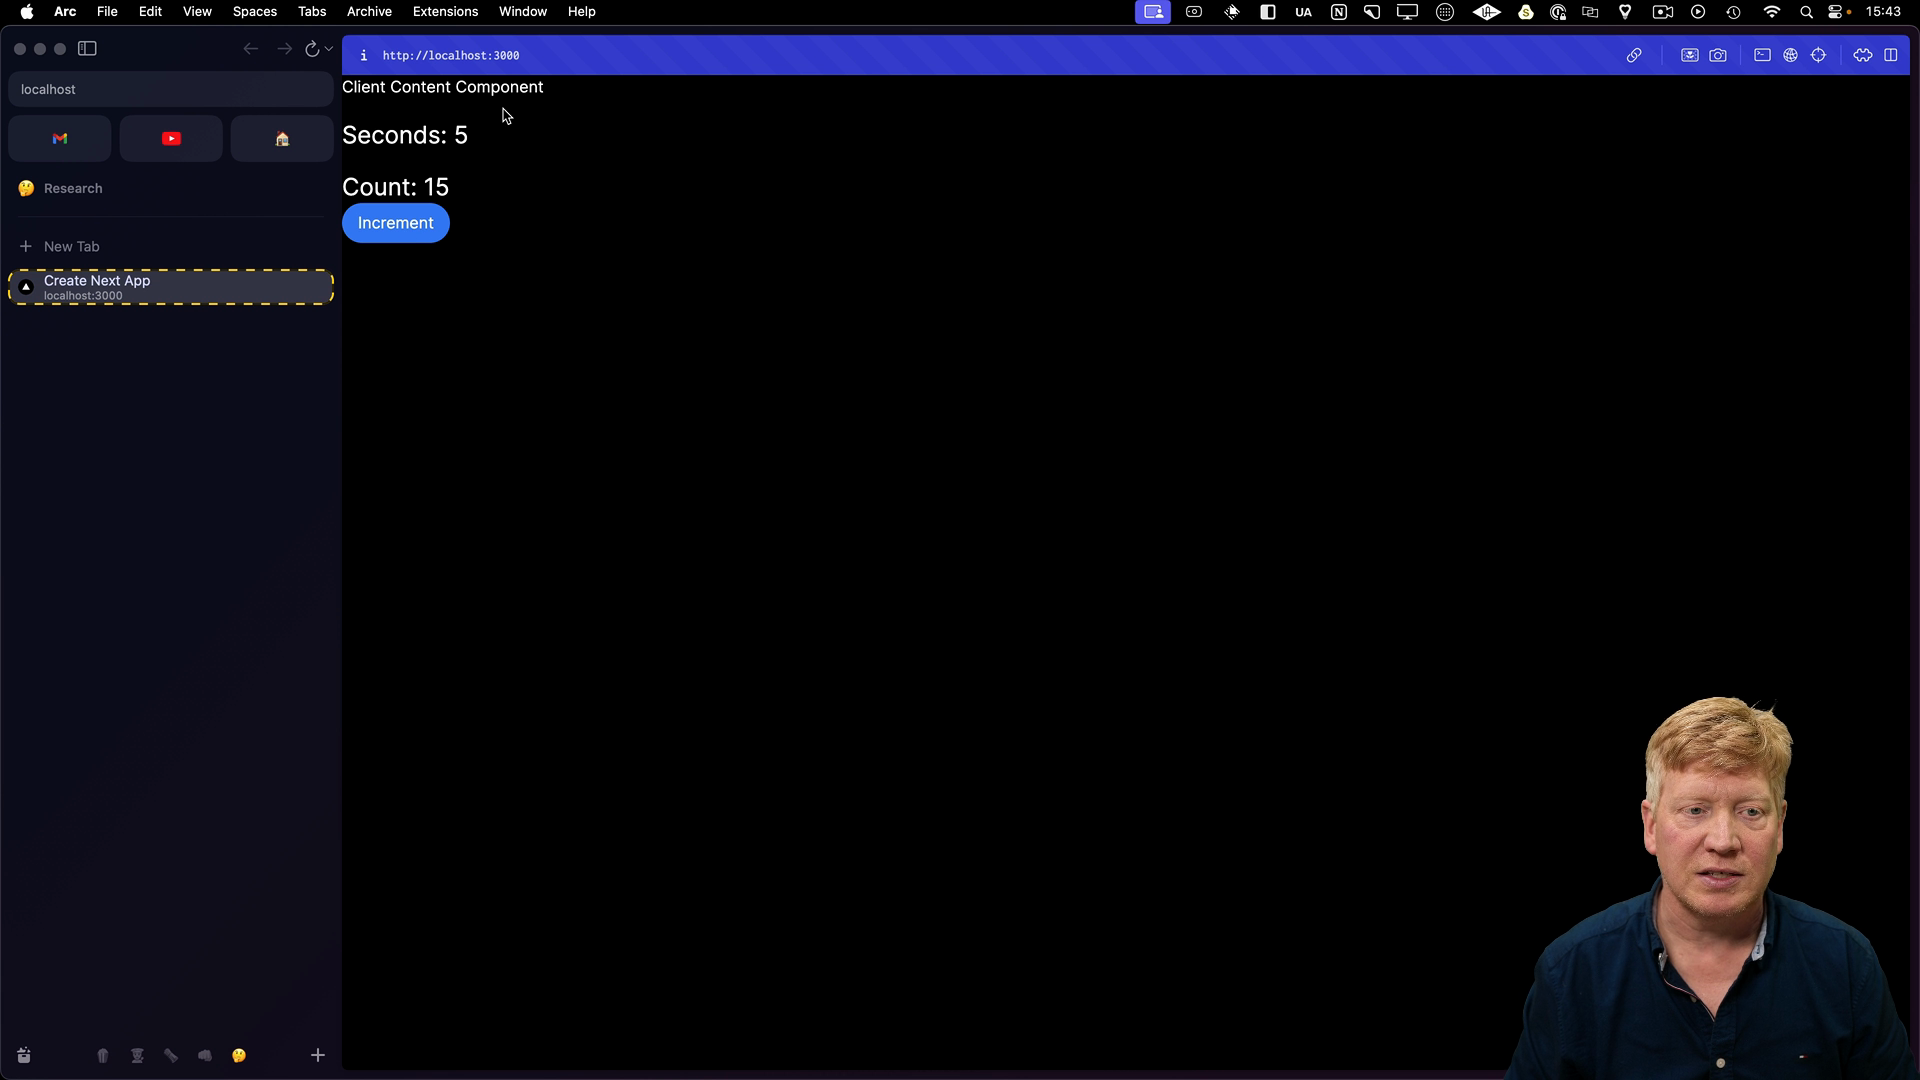
    Checking in the browser, we can see the components rendering as expected:

    the component renders

    Intercepting Server Actions

    In order to intercept server action requests and handle caching, we'll create a custom hook useCacheableServerAction. We'll patch fetch by decomposing its arguments to get the resource and config objects. We'll look inside of the config object to see if Next-Action is present and it is a POST request. If so, we know it's a server action so we'll hash the request and check if it's in the cache. If it is, we'll return the cached response. If not, we'll fetch the data, cache it, and return it:

    import { useEffect } from "react";
    import sha256 from "crypto-js/sha256";
    
    export function useCacheableServerAction() {
      useEffect(() => {
        const { fetch: originalFetch } = window;
        window.fetch = async (...args) => {
          let [resource, config] = args;
          if (
            // @ts-ignore
            config?.headers?.["Next-Action"] &&
            config.method === "POST" &&
            config.body
          ) {
            // @ts-ignore
            const json = JSON.parse(config.body);
            const hash = await sha256(
              // @ts-ignore
              `${config?.headers?.["Next-Action"]}:${JSON.stringify(json)}`
            );
            resource = `?hash=${hash}`;
          }
          const response = await originalFetch(resource, config);
          return response;
        };
        return () => {
          window.fetch = originalFetch;
        };
      }, []);
    }
    

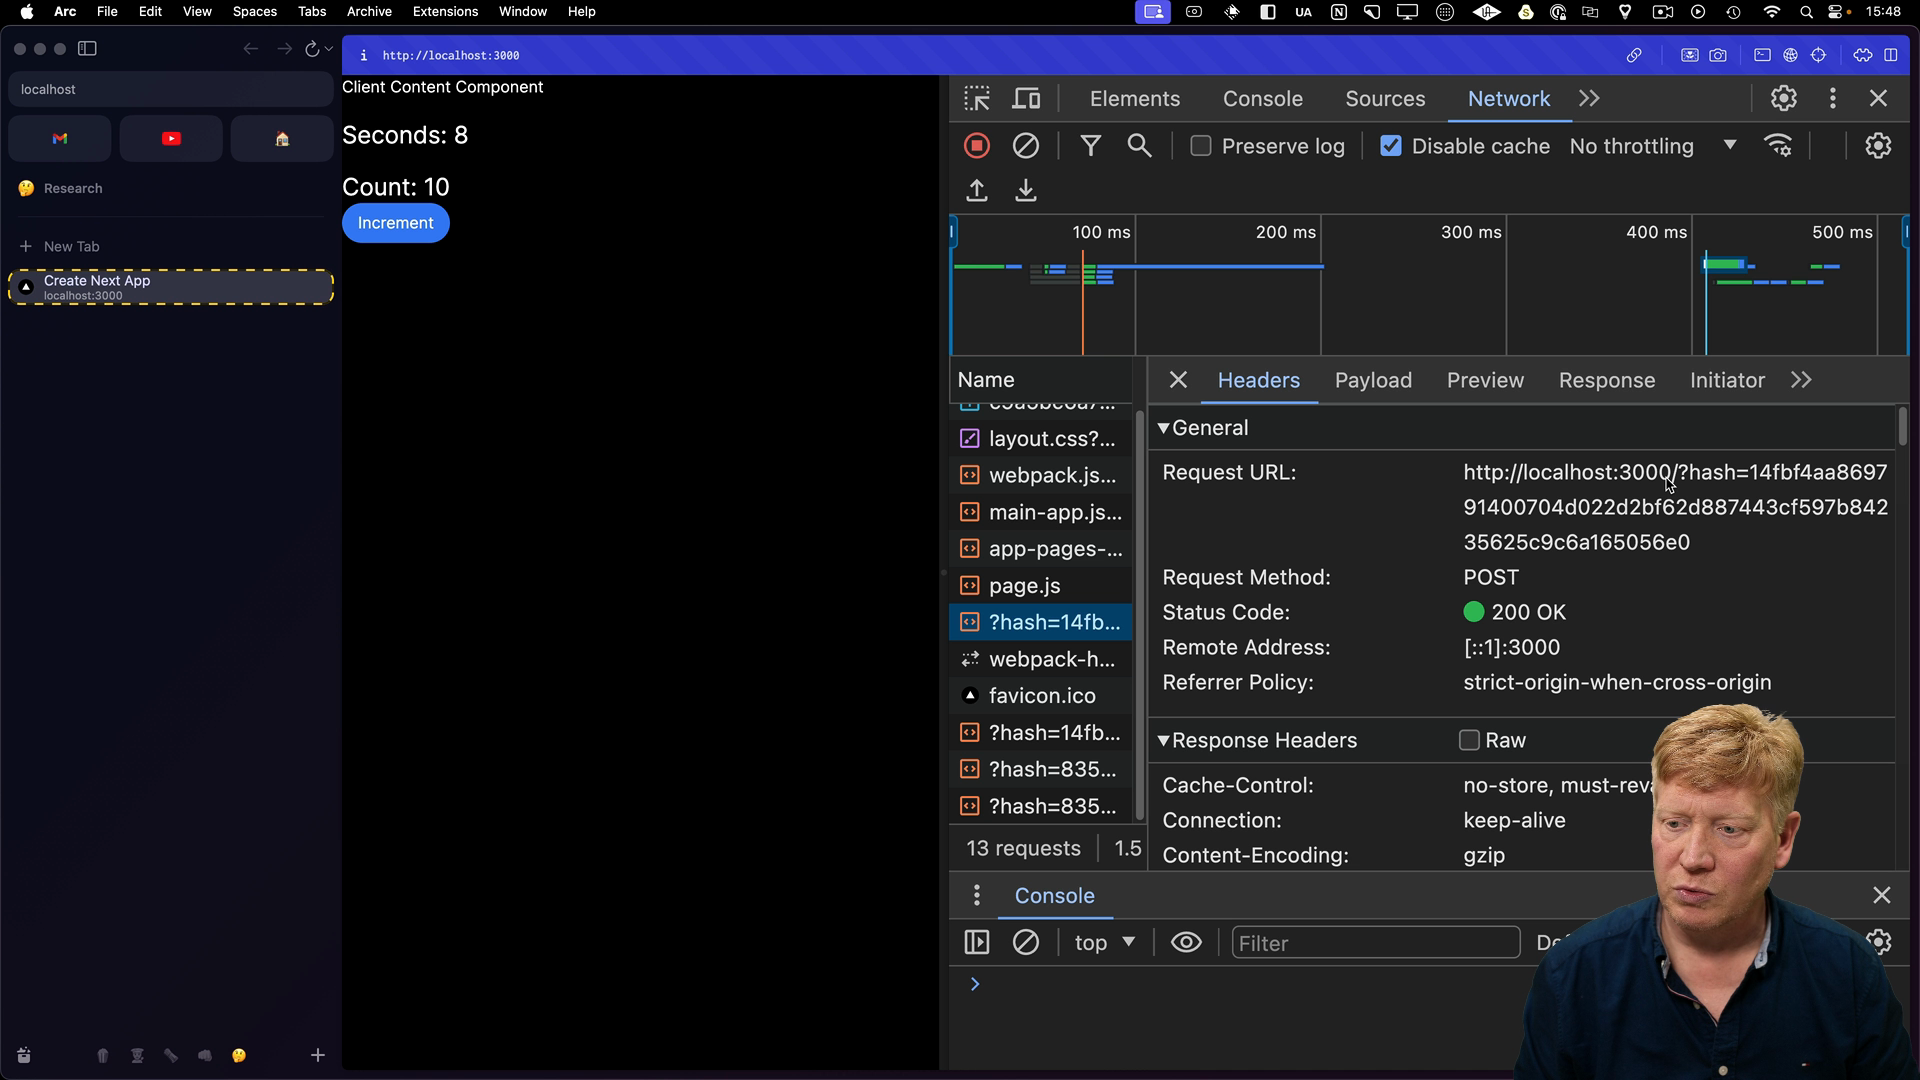
    Now when we refresh the browser, we can see that a hash is being included with the server action requests:

    hash in devtools

    CDN Simulator

    Now that we know the hashing works, we want to simulate the CDN and proxy all the requests to our Next.js server.

    The Express app that will act as our CDN simulator is in the cdn-simulator directory. It will intercept all requests and cache the responses based on the hash. If there is no hash, it will pass through as normal:

    // cdn-simulator/cdn-simulator.js
    
    const express = require("express");
    const { createProxyMiddleware } = require("http-proxy-middleware");
    
    const NEXTJS_SERVER = "http://localhost:3000";
    
    const proxy = createProxyMiddleware({
      target: NEXTJS_SERVER,
      changeOrigin: true,
      on: {
        proxyReq: (proxyReq, req, res) => {
          proxyReq.setHeader("x-forwarded-host", req.headers.host);
        },
      },
    });
    
    const cache = {};
    
    express()
      .use(express.json())
      .use("/", async (req, res, next) => {
        if (req.query.hash) {
          req.rawBody = "";
          req.setEncoding("utf8");
    
          req.on("data", function (chunk) {
            req.rawBody += chunk;
          });
    
          req.on("end", async function () {
            if (!cache[req.query.hash]) {
              const saResp = await fetch(`${NEXTJS_SERVER}${req.url}`, {
                method: "POST",
                body: req.rawBody,
                headers: {
                  ...req.headers,
                  "x-forwarded-host": req.headers.host,
                },
              });
              cache[req.query.hash] = await saResp.text();
            } else {
              console.log(`Cache HIT: ${req.query.hash}`);
              console.log(cache[req.query.hash]);
            }
            res.setHeader("content-type", "text/x-component");
            res.write(cache[req.query.hash]);
            res.end();
          });
        } else {
          return proxy(req, res, next);
        }
      })
      .listen(4000);
    

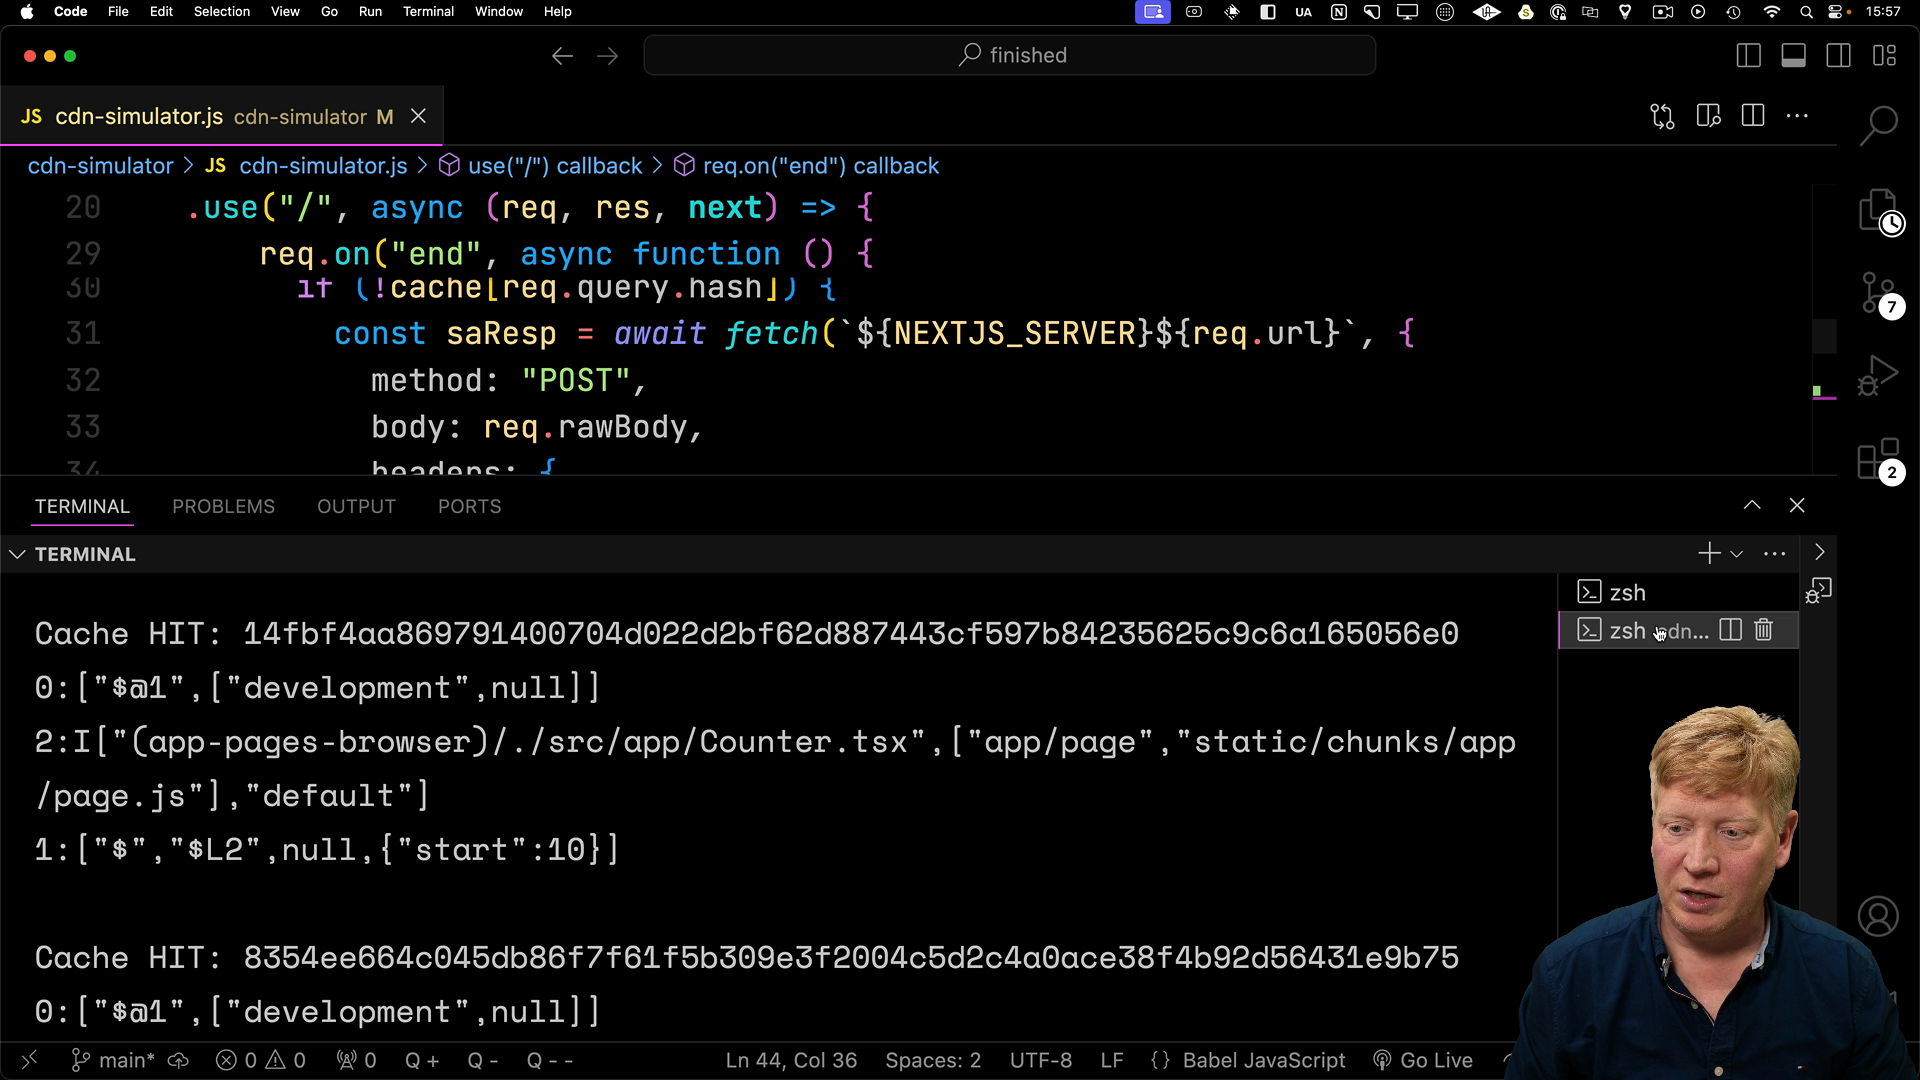
    Now when starting up the CDN simulator, we can see the cache hits in the console for the Counter and Time::

    cache hits in the console

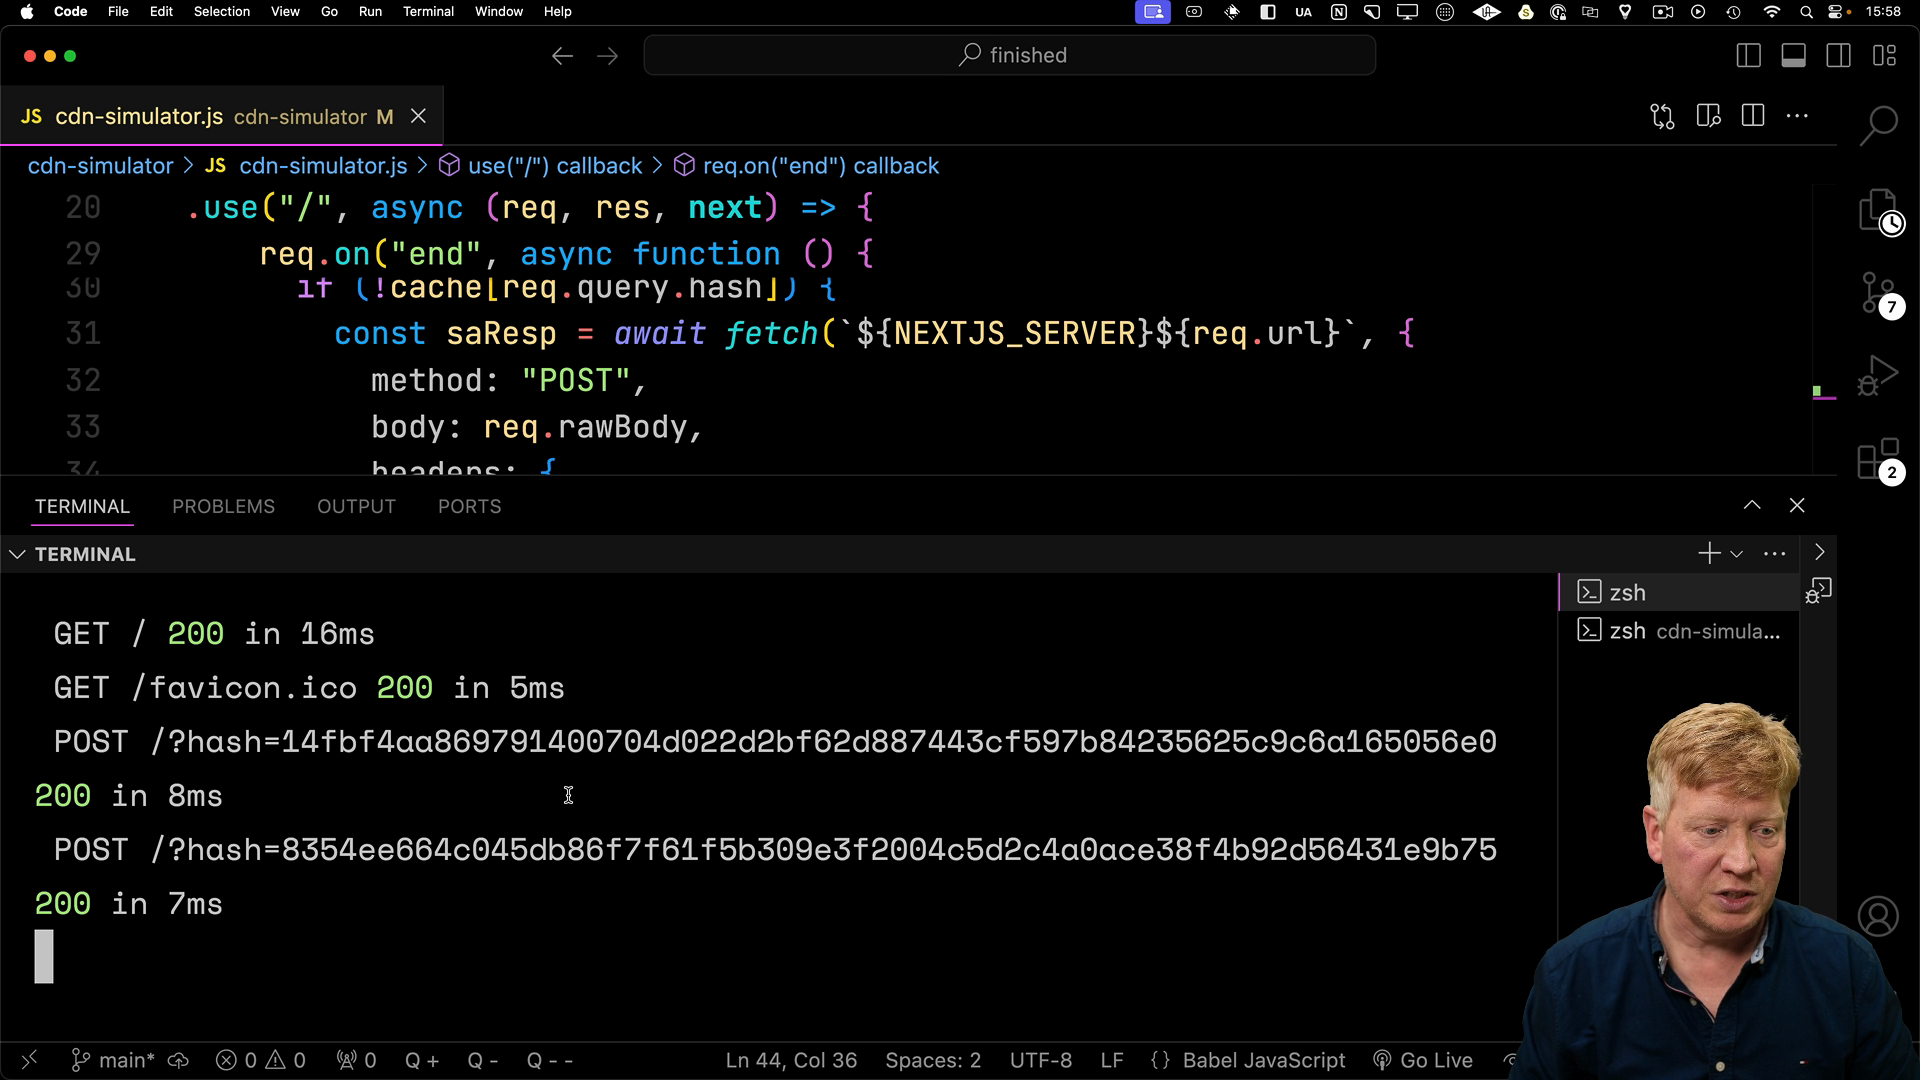
    However, for the Next.js App we only see the 200 for the regular page request.

    To really illustrate it, we can turn off the CDN Simulator and the Next.js console will show the server action requests:

    Next.js console with CDN simulator off

    Remember, this is an advanced technique that you shouldn't do unless you really have to, but now you know how!

    Transcript

    A really cool aspect of the Next.js App Writer is that server actions can return more than just data. It can actually return UI, and this is something that not a lot of people know about, but it's built into the App Writer and it's a fantastic piece of functionality. Now, my friends over at Haaretz in Israel are using this server action system to actually cache portions of their content site. So I'm going to show you how to do that in this video. It is a very advanced technique and I strongly recommend that if you don't need this, you shouldn't do this.

    But if you need it, this is something you can do. So I'm going to use Slashdot here as an example of how this might be potentially helpful. So how does Slashdot work? Well, Slashdot sits on top of what's called a content delivery network or CDN. So what actually happens when the client makes a request to Slashdot, it gets intercepted by the CDN or content delivery network.

    That content delivery network then says, do I have this page in my cache? If it does, then it returns it. Otherwise, it goes to origin, which in this case would be our Next.js server. Next.js server would return the page. It would go back to the CDN, which would then cache that route and then return it to the client.

    Next time around the client asks for that route and the CDN says hey I've already got it and returns it. The value is that it takes a lot of pressure off of the Next.js server. Not all the requests need to go to the server. Now most high traffic sites sit on top of a CDN and the very least they'll go and cache their images and JavaScript bundles in a CDN so that the Next.js server doesn't have to serve off those static assets. It just handles the dynamic requests.

    How does this apply to something like Slashdot? Well, this route, this homepage route would be cached entirely. So all of the content on this page would be cached. And then when they would make an update to that page, they would bust the cache on the CDN. And then the CDN would go and get a new copy of the page and start returning that off as the current newest version.

    Problem is that you're stuck at the granularity level of the whole page. What if you want to go and have the cache just be a section of the page, like this most discussed section in here? Well, server actions to the rescue. Server actions can return UI, like getCounter here is just going to return a counter, and getTimer is going to return a timer. You can return static HTML, you can return a combination of static HTML and client components, or you can return full client components just like this.

    It's not a problem. So in our slash dot example, a client component for most discussed is going to make a server action request to the server to go and get the client component or the most discussed HTML and then render it right in that section of the page. So let's talk about how a server action works. So a server action works by the client doing a POST request to the same route that it's on. So if you're on the slash, it's going to POST another request to slash and POST to slash.

    And then as part of that request is going to add on a next action header. Now the Next.js server is going to see that there is an incoming post request to this page route with the next action header and it's going to run that action, get back that content, and then send it back to the client. So what gets sent back to the client? Well it's flight data. So if you've seen this at the end of your HTML page, this is the essentially serialized DOM that the App Writer and React 19 use to hydrate the DOM on the UI side.

    So it's essentially sending this back to the client and then on the client side, the client is then interpreting the flight and then building out new DOM based on that flight data. So how does this apply in this case? Well what they're going to do is on the client side they're going to intercept that request, that post request, it's a simple fetch so they basically monkey patch fetch look for this next action header which is part of that request and then they go and take that next action header which is what's required to actually invoke the post request on the server and they serialize that onto the URL as a URL parameter. It's a hash key on the URL. That then goes to the CDN.

    So let's say that's a cache miss. The CDN then makes a request to Origin to go get the result of that post request, that flight data. Next.js sends back the flight data. That goes back to the client. Now in the subsequent request again we intercept that request and again we serialize that hash with that next action.

    This time the content delivery network which is actually configured to cache posts with that hash key then returns that flight data right away. Normally, content delivery networks don't cache any kind of post, put, patch, or delete. I mean, that's not the kind of thing you'd want to cache, right? So there is special configuration required on the CDN side to make any of this happen. Of course we don't have a CDN just lying around and we want to experiment with this.

    So what we're going to do instead is we're going to create our own CDN simulator. So that's going to be an Express app sitting on localhost 4000, and that's going to sit between our client and our Next.js server. Let's go check that out in the code. All right. So here is our starter app.

    It's a basic Next.js app. It's got a couple of components already baked into it. It's got a counter and a timer. These are just two client components. In fact, let's put them onto the page right now so we can see them.

    Now my counter requires a start value, so I'm going to give it a start of 10. All right, let's give it a go. So I'm looking at localhost on port 3000. I'm going to increment my count. So that looks good.

    We've got those two components. So now we know what they look like. Now, in order to get this working, we need some server actions. So let's go create a server action that returns a counter. So to create a server action I just create a local asynchronous function, we'll call it getCounter, we use the useServerPragma, and then we'll just return the JSX with counter start.

    It's that easy. Now let's also create one for getTimer. And Let's start building out a client component that's going to take these server actions and then invoke them on a use effect. To do that, I'm going to create a new component called clientContentSection.tsx and into there, I'm going to create a component. That component is going to take as parameters on getCounter and on getTimer.

    So now let's go bring that into our page, and then invoke that. Now, I need to give it those server actions. So getCounter is going to become onGetCounter and onGetTimer is going to be assigned to getTimer. Now we no longer need our counter and timer. Those are going to be created by this client content section component.

    Okay, so now that we have that over in our client content section, we need to create some state. The state is going to hold the result of those server actions. So we'll create two use states, one for the counter and one for the timer, and both are going to hold a React node. Down in our JSX down here, we'll simply render those into divs. And then the last thing we need to do is create a use effect that's going to make those calls to those server actions.

    To do that, we create a use effect that has an empty dependency array so it gets called on startup, and then we just simply set the counter to awaiting the onGetCounter and set the timer to awaiting the onGetTimer. All right, let's see how this goes. Hit refresh, and there we go. Just make sure this is that component. We're going to add a little H1 up there.

    And hey, Let's reverse the order on these. Okay. There we go. So we got our timer running, we got our count running, and this is the client content component. Cool.

    So now we want to actually cache these. So the first thing we need to do is on the client side, we need to go and intercept that request to the server. To do that, I'm gonna create a new custom hook called useCacheableServerAction. We'll just start off with a use effect. Now, what we wanna do is on the client, we wanna capture any fetches.

    So we need to patch fetch. To do that we grab the original fetch off window and then we create a new window.fetch of our own design. Now our window.fetch is going to take arguments and then it's going to decompose those arguments. It's going to get the resource which would be the URL and then the config and then it's just gonna at this point just call the original fetch with those resourcing config and return the response and then when the use effect unmounts we're gonna unpatch window.fetch we're gonna return window.fetch the original fetch that we found. Now of course we're actually sitting on top of an already patched fetch from Next.js which is sitting on top of another patch fetch which at the time of this recording was on React.

    There's some talk about how React is going to remove that fetch but we haven't had that yet. So we have multiple levels of fetch patching going on right here. Well, let's just make sure this works first. Let's go over to our client content section, bring in this custom hook. And then we'll invoke that in our component, and let's give it a try.

    Now, it should just work and it does just work. So that's great. So now we need to go and specifically look for server actions. So up here, we're going to take a look at the config. We're going to look in the headers for that next action header.

    We're also going to look to see if the post and also that it has a body. If all three of those conditions are met, then we know that we have a server action. Now, the next thing we're going to do is we're going to build this hash. So for that, we're going to bring in SHA-256 from Crypto.js. Then we're going to start building out our hash.

    One part of our hash is going to be the body itself. So any arguments that go to the server action are gonna be in the body. So if you invoke a server action with different arguments, that is going to get rolled into that hash and create a unique hash. So that's a critical element here. You want to add the body to that next action to get a really truly unique hash.

    So we'll take that body and we'll add it to our next action and that's going to give us our completed hash. And then we'll just append that hash to the URL. The URL in this case is named resource. So let's hit save, give this another try, hit refresh. Now we're going to go over to our network inspector just to make sure that we're actually trapping that correctly.

    So we can see that we're getting multiple requests to localhost 3000. They're still POST requests but now they have our hash on it. Now that we have our fetch intercepted, now we actually want to simulate the CDN and proxy all the requests going to the server through our simulated CDN. To do that, we bring up another terminal, and we go into the CDN simulator, install it, and I'm going to start it, and I'll show you what the code looks like. So inside that CDN simulator directory, we've got the CDN simulator.js file, which has our Express Server, which is bringing in the proxy middleware.

    That proxy middleware is going to be what we're going to use to basically proxy everything that is not one of these Next.js server actions. Then we're going to go and create an express server. We're going to add on the JSON middleware that's going to parse any bodies. Then we're going to proxy on slash. We're going to listen on port 4, 000.

    So let's try this. Now, where does that proxy go? Well, if we look back up at our proxy configuration, the proxy configuration is going to proxy to the next AS server which is located at localhost 3000. All right, let's give this a try. So ideally if I go to localhost 4000 here it should look exactly the same and it does.

    Awesome. So every request is going through our CDN simulator on port 4000 to port 3000 on the Next.js server and then coming back through. So the next thing we want to do is over in our CDN simulator, we want to go and look at each request and see if it's got that hash on the end of the URL. So if it has a hash, we're going to process it. Otherwise, we're going to just let it flow through the proxy.

    So what do we want to do as a server action? Well, the first thing we want to do is actually process the server action correctly, and then we'll get to the caching of it. So the first thing we need to do is get the post body from the server action so that we can then do a fetch from right here to the server to get back the payload that will then cache. To do that we've got to do something pretty nasty. We got to go and parse the body ourselves.

    We're going to take the request, we're going to go and add on a raw body to the request, then we are going to look at the data events, and then add on to that raw body until we get to the end of the body coming in from the client. Once it's there, we can make a request to the server. To do that we simply just make a fetch to the server and then recreate the request. Now we do need to forge the exported host header on the request because the Next.js server actually looks at that to make sure that the request is coming in from the same client as where it was served from. In this case, it's on 4, 000, but we need to forge it to be back to 3, 000.

    Now once we've got the response, we can get the text from it, and then we can send that back to the client, and hopefully this should still work. So let's go and reboot the simulator. And then we'll hit fresh, and yeah, that's great. We're on 4, 000 and it's still working. So we haven't broken anything yet.

    Now it's time to actually cache that request. So we need to see if this hash is in the cache. So our hash is on RECQUERY-HASH, and our cache is in a module global called cache. So up here, before we make that fetch, we're gonna check to see, is there anything in that cache? And if there isn't, then we're gonna go and get it.

    And then down here, we'll set the cache, we'll return the cache, and we'll add a nice little console in here to tell us that we've had a cache hit if we do have one. All right, so let's hit Save. Rerun the simulator, hit Refresh. Now I can see that we've actually gotten, because UseEffect is actually run twice, we actually had a cache miss the first time and then we had a cache hit with our hash. We made the request to the server.

    We got the payload back, we cached it, and then we returned it back to the client. If we take a look over at our Next.js terminal, We can clear it, and then we can refresh, and we can see that no matter how many times we do that, all we're getting is a 200 for the original page. We're not getting the post requests that we were seeing before. To really illustrate this, let's turn off our in-memory CDN simulator, restart it, and then over here, clear that terminal, wait refresh. We'll see the first posts come in and then after that any subsequent posts are running out of our CDN simulator.

    There you go, the super advanced technique of caching server actions. Of course, all the code is in the course code base. If you need it, this is the kind of thing you want to do, but if you don't need it, I don't recommend doing this. This is a very advanced technique and if you don't need it you shouldn't do it. But if you need it, well, now you know how to do it.